

UPDATE: 2021-05-06 Tape deck now also controlled via a Psion Series 3a 😀
One of the small benefits of spending more time at home during the COVID-19 pandemic was having the opportunity to really appreciate music at home, to properly take some time out and listen to a whole album, uninterrupted. Especially analogue stuff – pop a tape in the tape deck or drop a record on the platter…
Pre-COVID my job had me travelling a lot and most of my music consumption had been whilst on the move – Spotify in the car or on the train or possibly listening to downloaded playlists/albums through noise cancelling headphones on a plane…
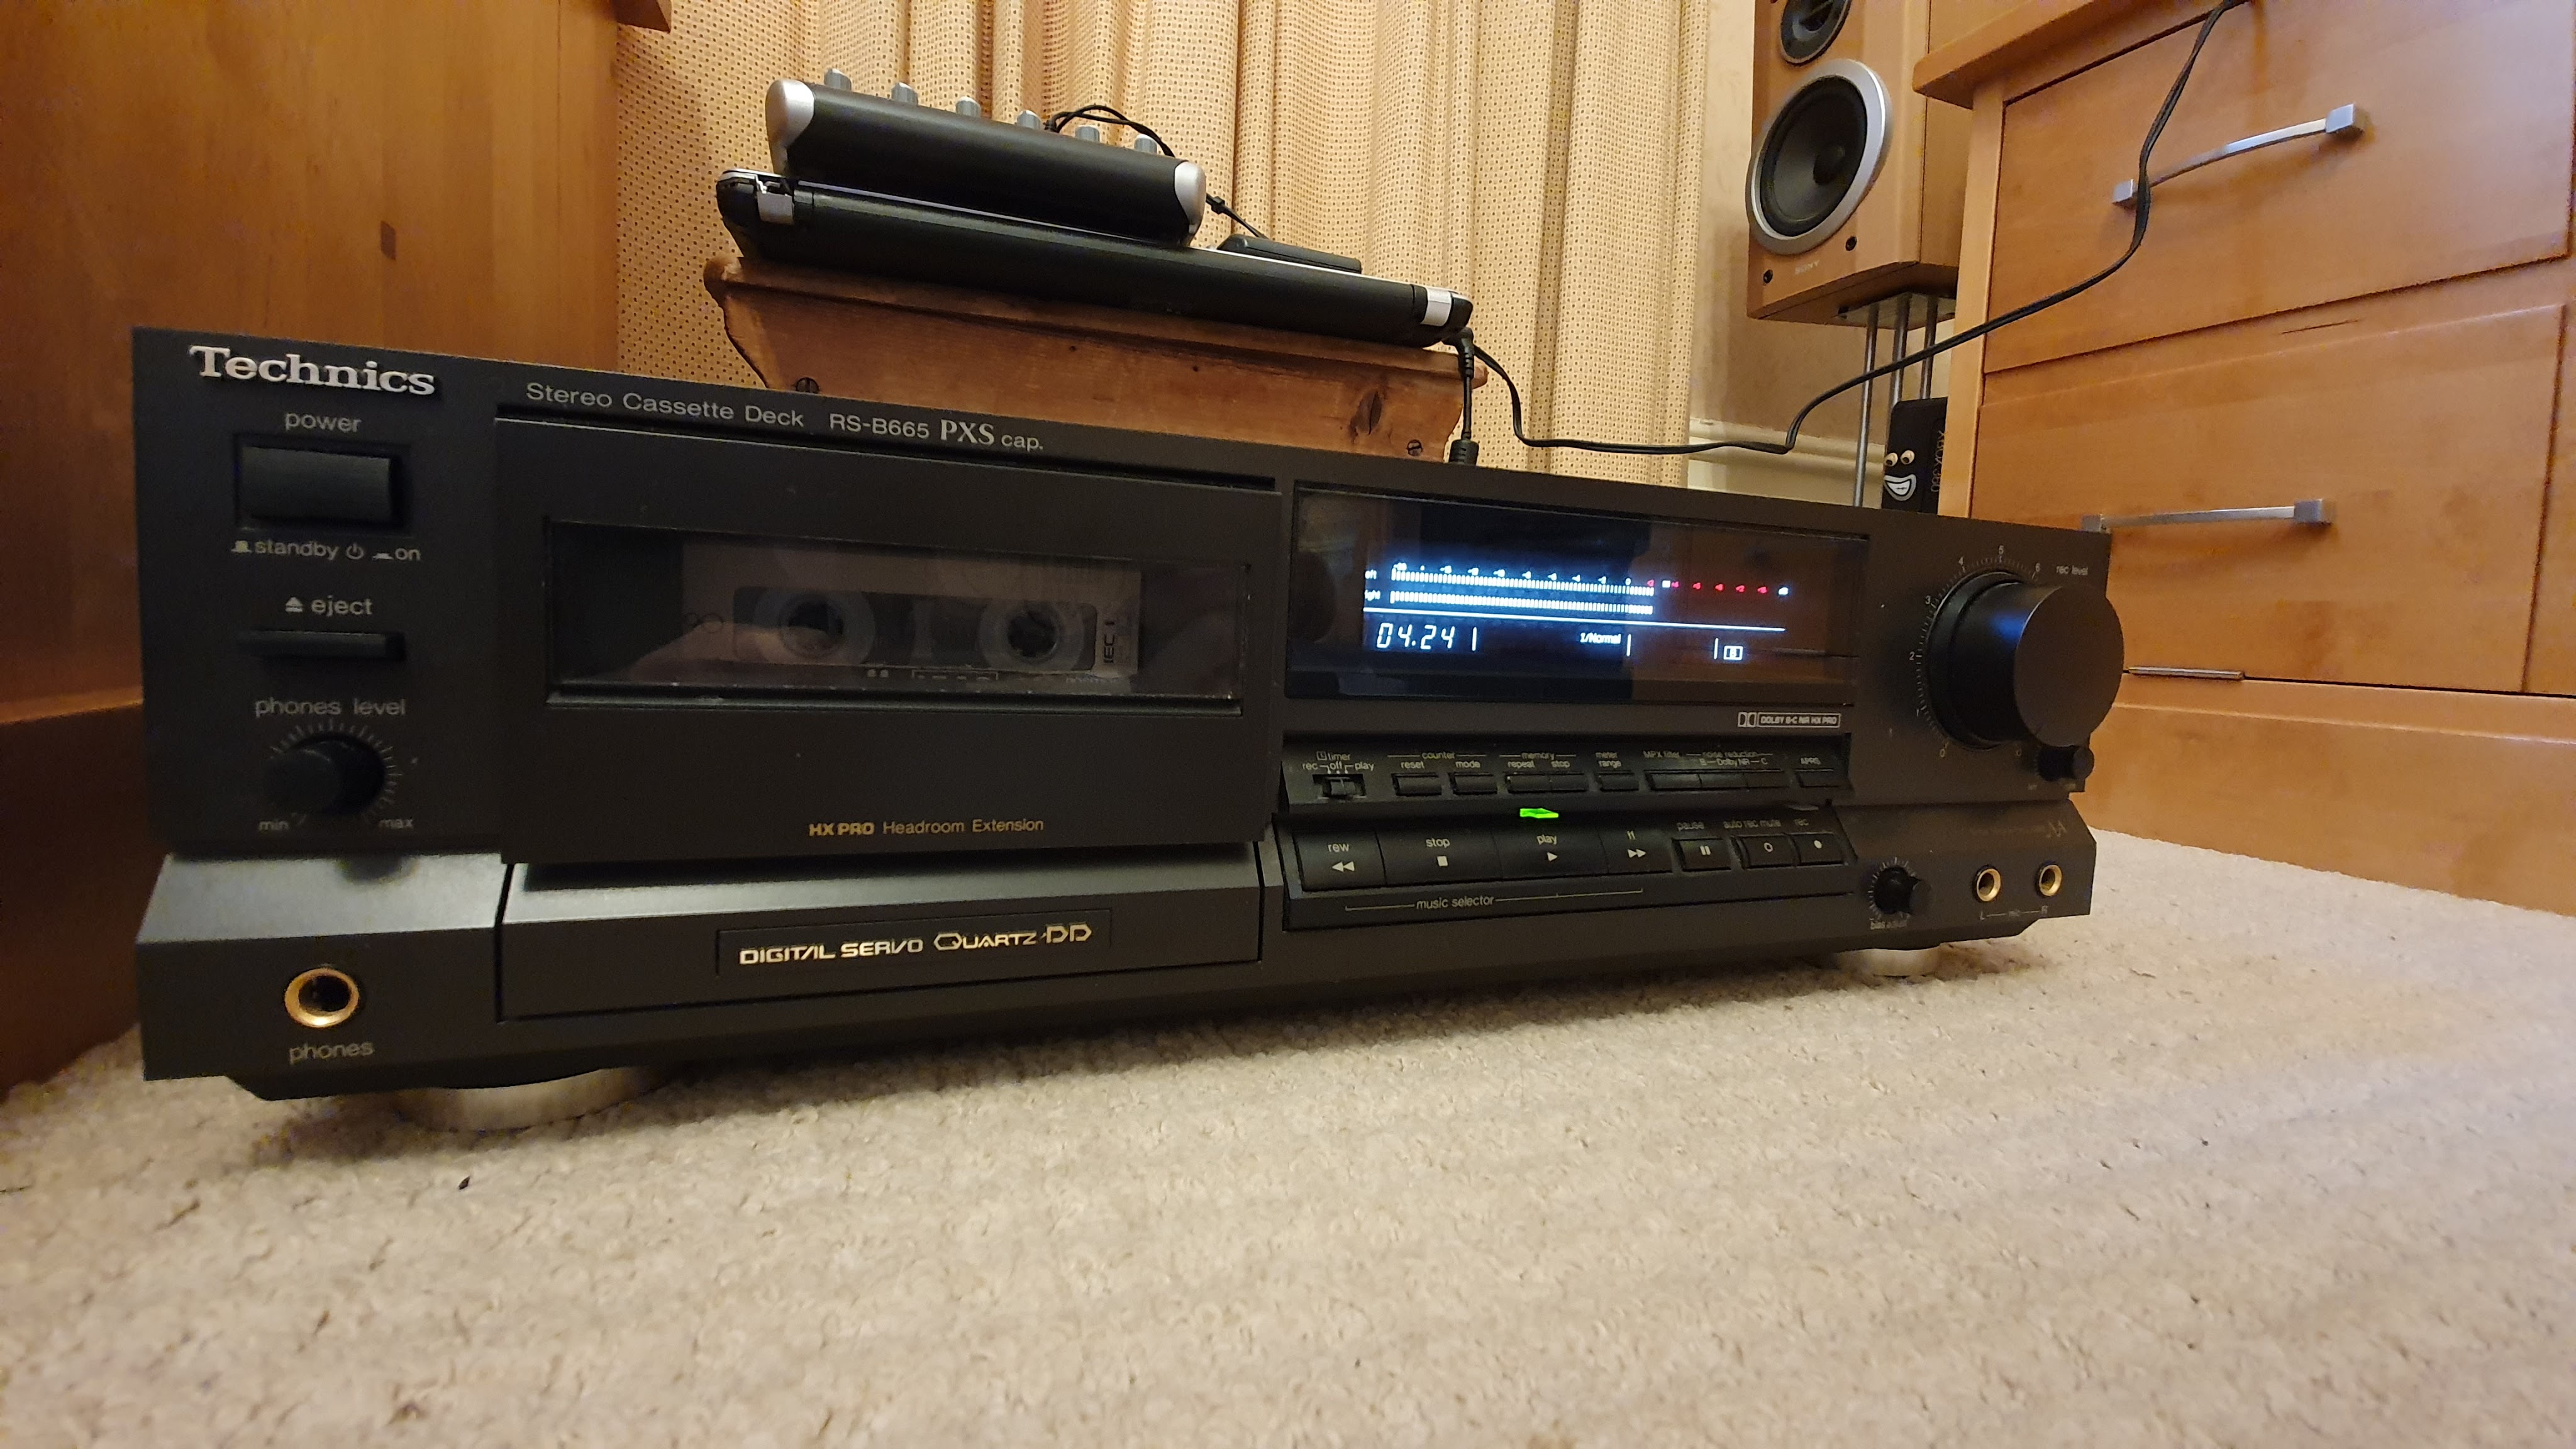
Like many people over a certain age I had a few old Hi-Fi separates stashed away in the loft or cellar, things like “music centres”, record decks, cassette decks etc. Back in the 1990s I had a “proper” Hi-Fi separates system comprising Linn turntable, Creek amp and Technics cassette deck and have never been able to part with it so it sits most of the time in storage, coming out occasionally to impress the kids with tales of what life was like before the internet. (And also to bore them rigid with the “when Dad played bass in a band at school” tape. Yay for “Aquainted with the Nite“[sic]!)

Around October 2020 I got the cassette deck out again and this time it was a little ill. Common with all decks of this range & era a small plastic motor drive wheel becomes brittle & cracks with age but thanks to a quick visit to tapeheads.net I managed to diagnose & fix the problem. Another issue these Technics decks suffer with is tarnishing/oxidation of the contacts behind the front panel push-buttons used for all the main functions (STOP/PLAY/FF Dolby off/on etc.) and mine was displaying some intermittent symptoms – i.e. press the “FF” button but the deck actually goes into “PLAY”.
(Excellent technical appraisal of the long-term reliability and servicing of this deck available here )
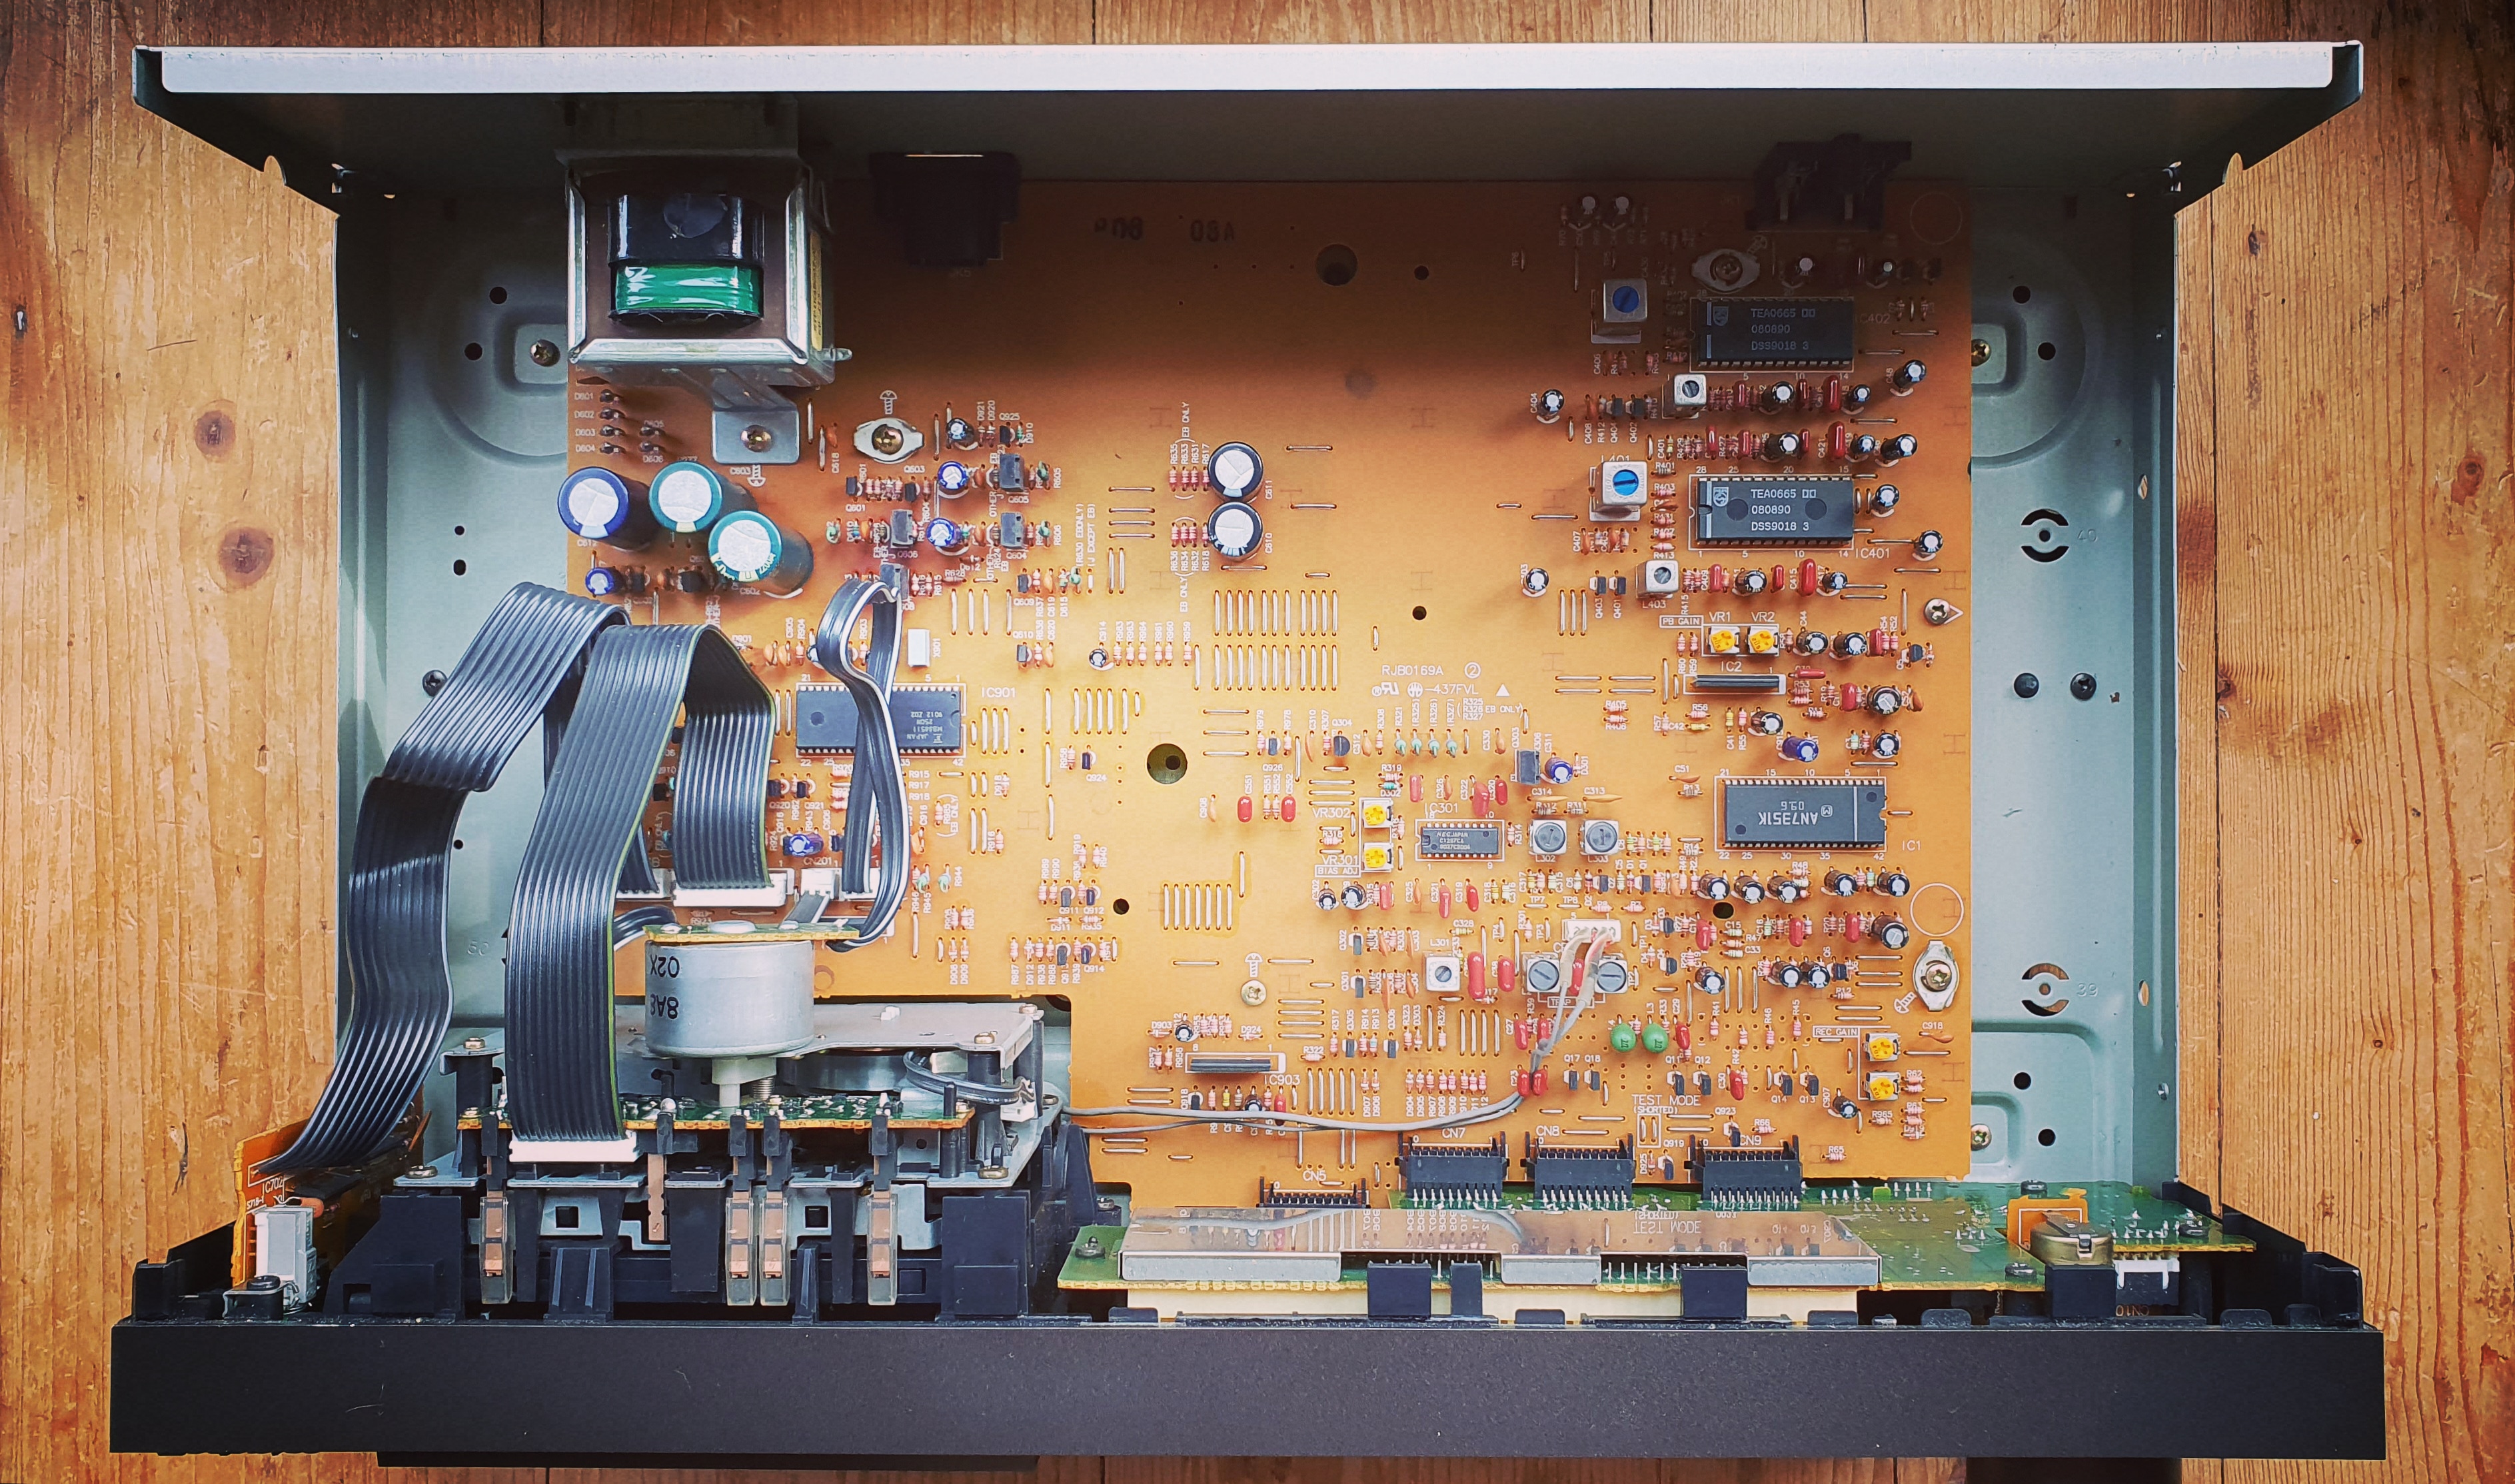
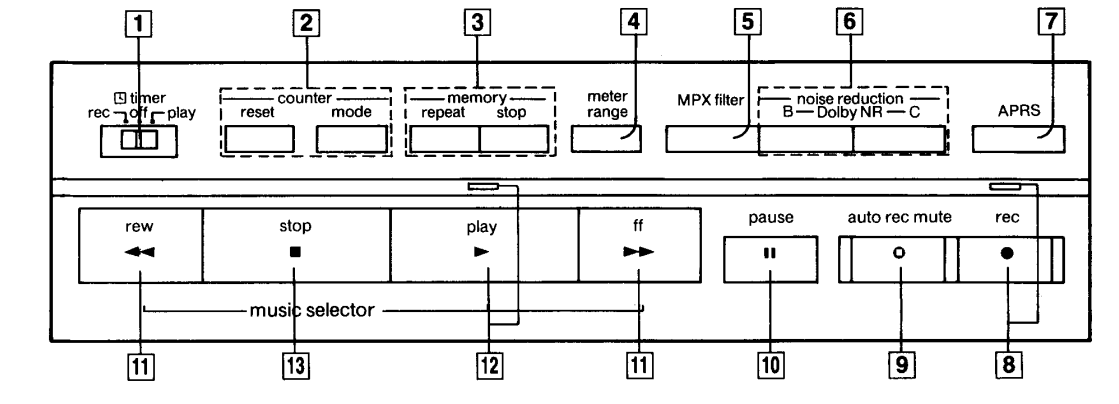
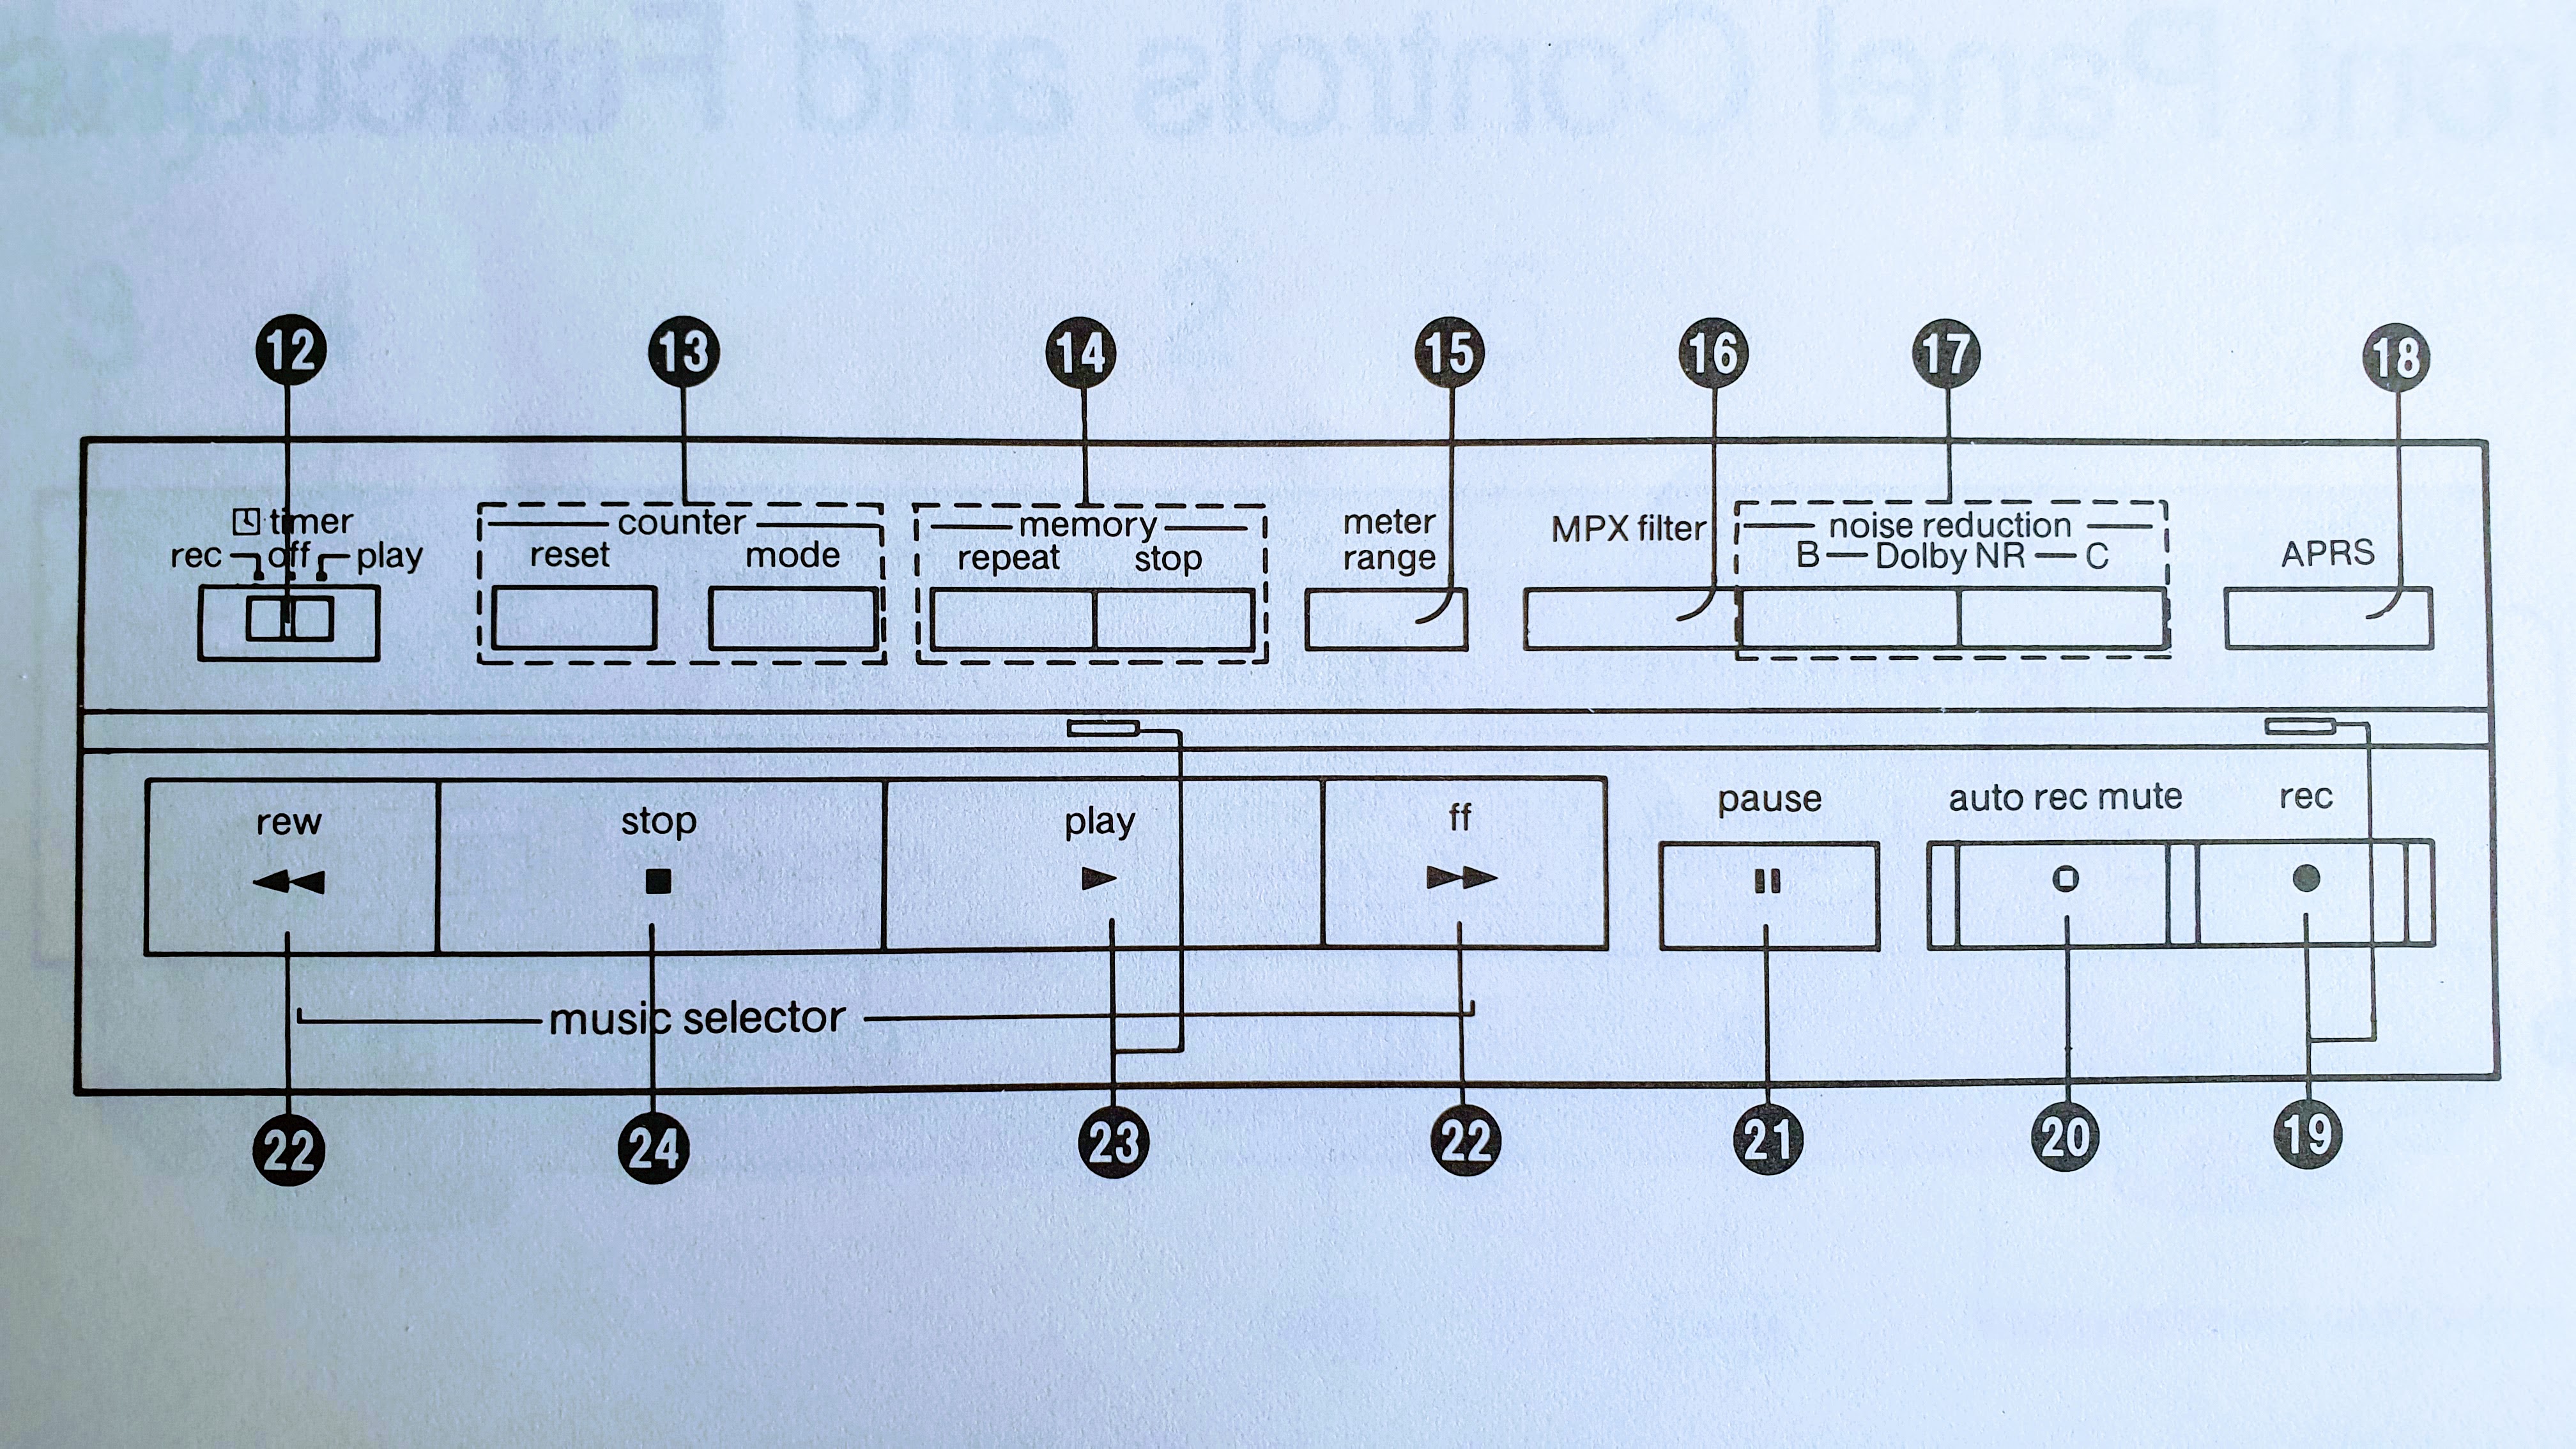
Luckily I found a service manual on the internet for the deck and the push-button front panel part of the schematic can be seen below:
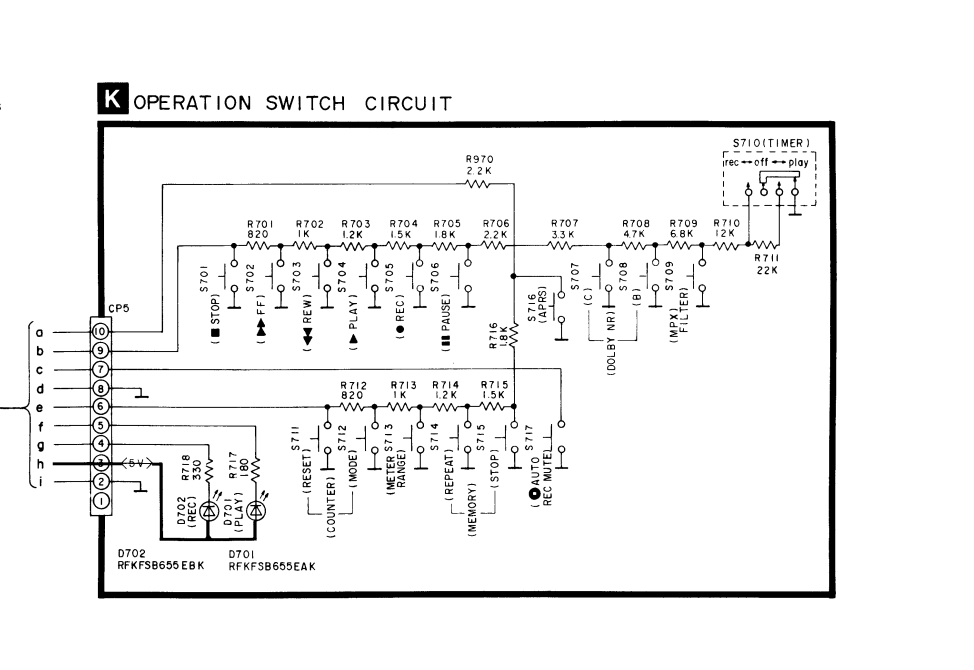
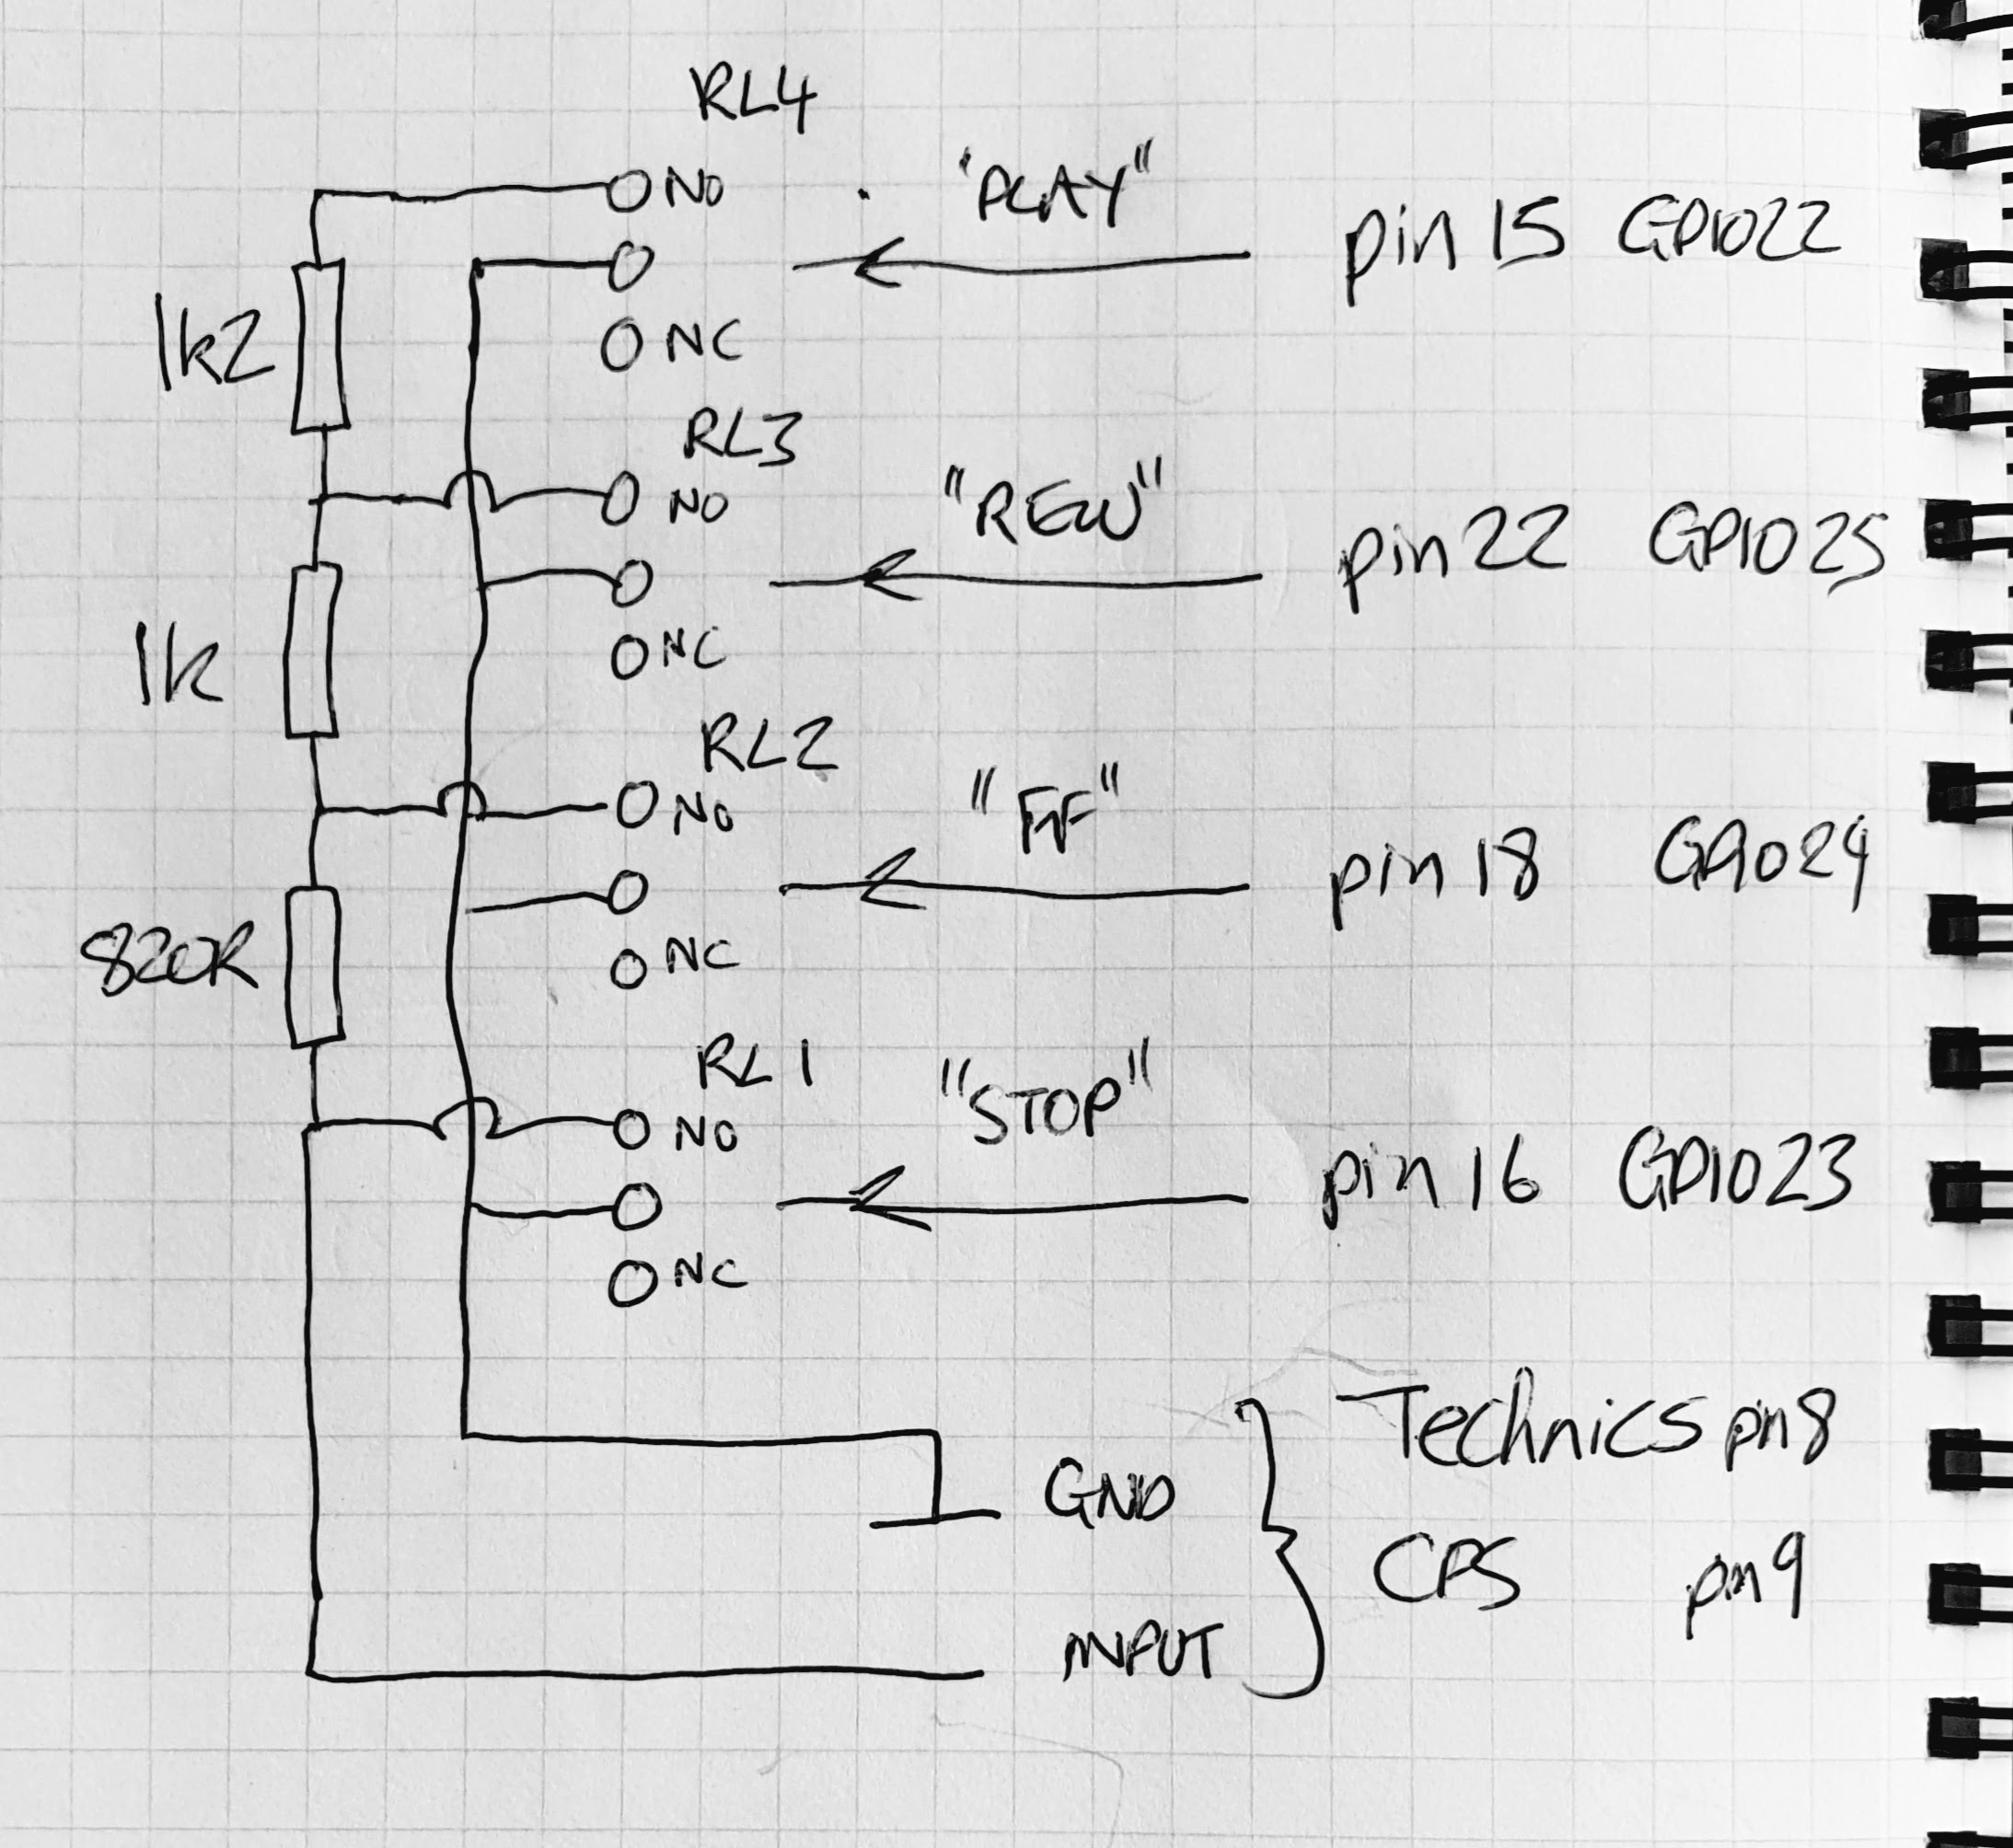
A very common mechanism is used in lots of consumer electronics of this type: a resistor chain is grounded at various points to signal to the mechanism control logic what mode is requested. This explains why a tarnished button contact with a higher resistance is interpreted by the logic as a mode further up the chain (e.g. “PLAY” instead of “FF”).
As a long term fan and avid user of the Raspberry Pi ever since its introduction I’m always looking for ways to modernise old equipment and add extra functions using a Pi here and there – what if I could replicate the resistor chain and have a series of relays, RPi GPIO controlled, to remotely control the tape deck from my phone over wifi? I already had a Pi sat next to the Hi-Fi as I had a new turntable with a built-in USB audio output and had used Icecast/Darkice on the Pi to stream the turntable audio around the house. I reckoned I could interface relays/resistors controlled via GPIO to the the existing connector CN5/CP5 with only 2 wires (GND & input) to control the cassette deck. I imagined a web interface to the RPi with buttons on to mimic the tape-deck’s control panel that would ground the resistor chain at the appropriate point to send the correct signal to the control mechanism. The relay only needs to be operated for a fraction of a second to simulate what happens when a user presses the button.

All code at: https://github.com/zedstarr/RS-B665-Remote-Control
I found some great resources on the internet such as Thomas Stewart’s RasPi control for a reel-to-reel deck. I prototyped two different approaches: a minimalist python-based script and a Node-RED version (both of them inspired by Henry Cheung’s E-tinkers.com blog). The python script performed both the web server function and controlled the relays directly via GPIO pins, the Node-RED implementation produced a UI with buttons that executed individual python scripts to control the GPIO signals.
I went for a 4-relay module initially to give me STOP/PLAY/FF/REW but there’s no reason why this couldn’t be expanded to add more relays to cover other functions like REC/PAUSE/DolbyB/DolbyC etc. The 4 functions are enough for me right now, occasional listening to old cassettes. Selecting a relay module that’s controlled via I2C would make more sense if I were going for replicating all 16 buttons on the deck’s front panel, but a direct GPIO pin–>relay mapping for now is not too cumbersome for the main 4 functions.
I decided to install the relay module outside the tape-deck so that either a Pi can be used to control the relays or another dedicated piece of passive hardware like a box on a long-ish lead with plain old push button switches….
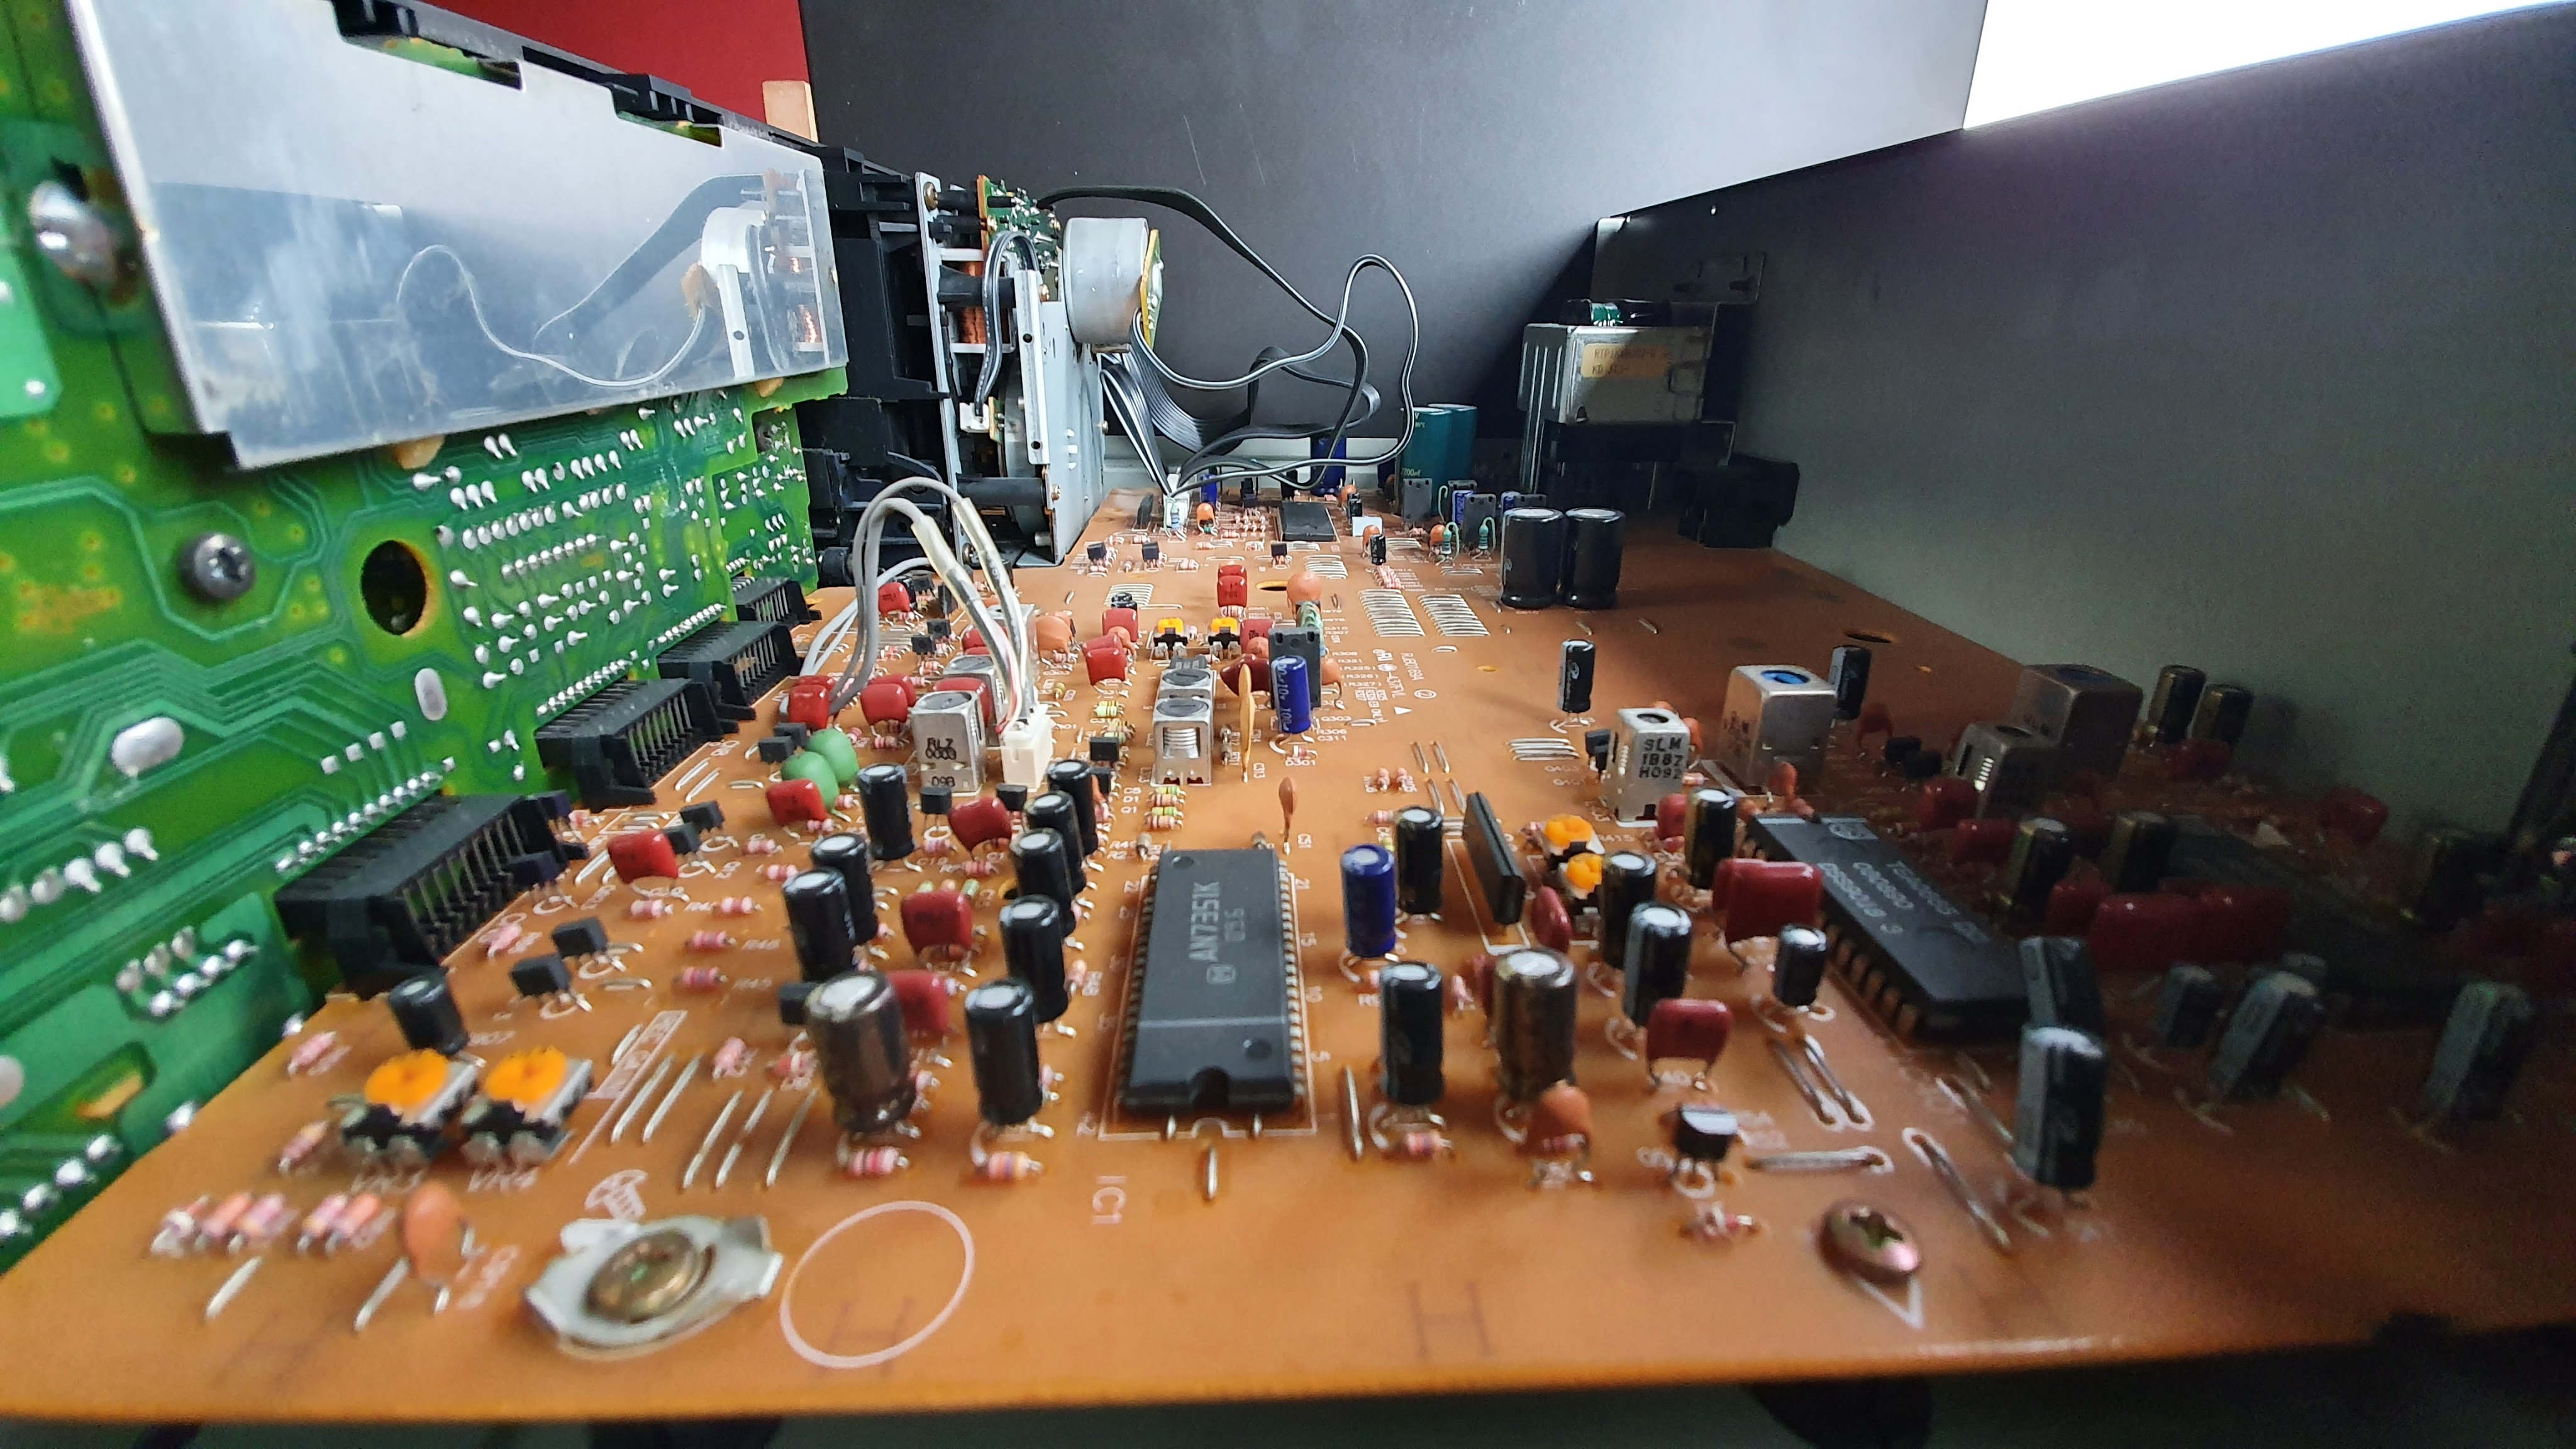
Time to take a drill & soldering iron to the deck:
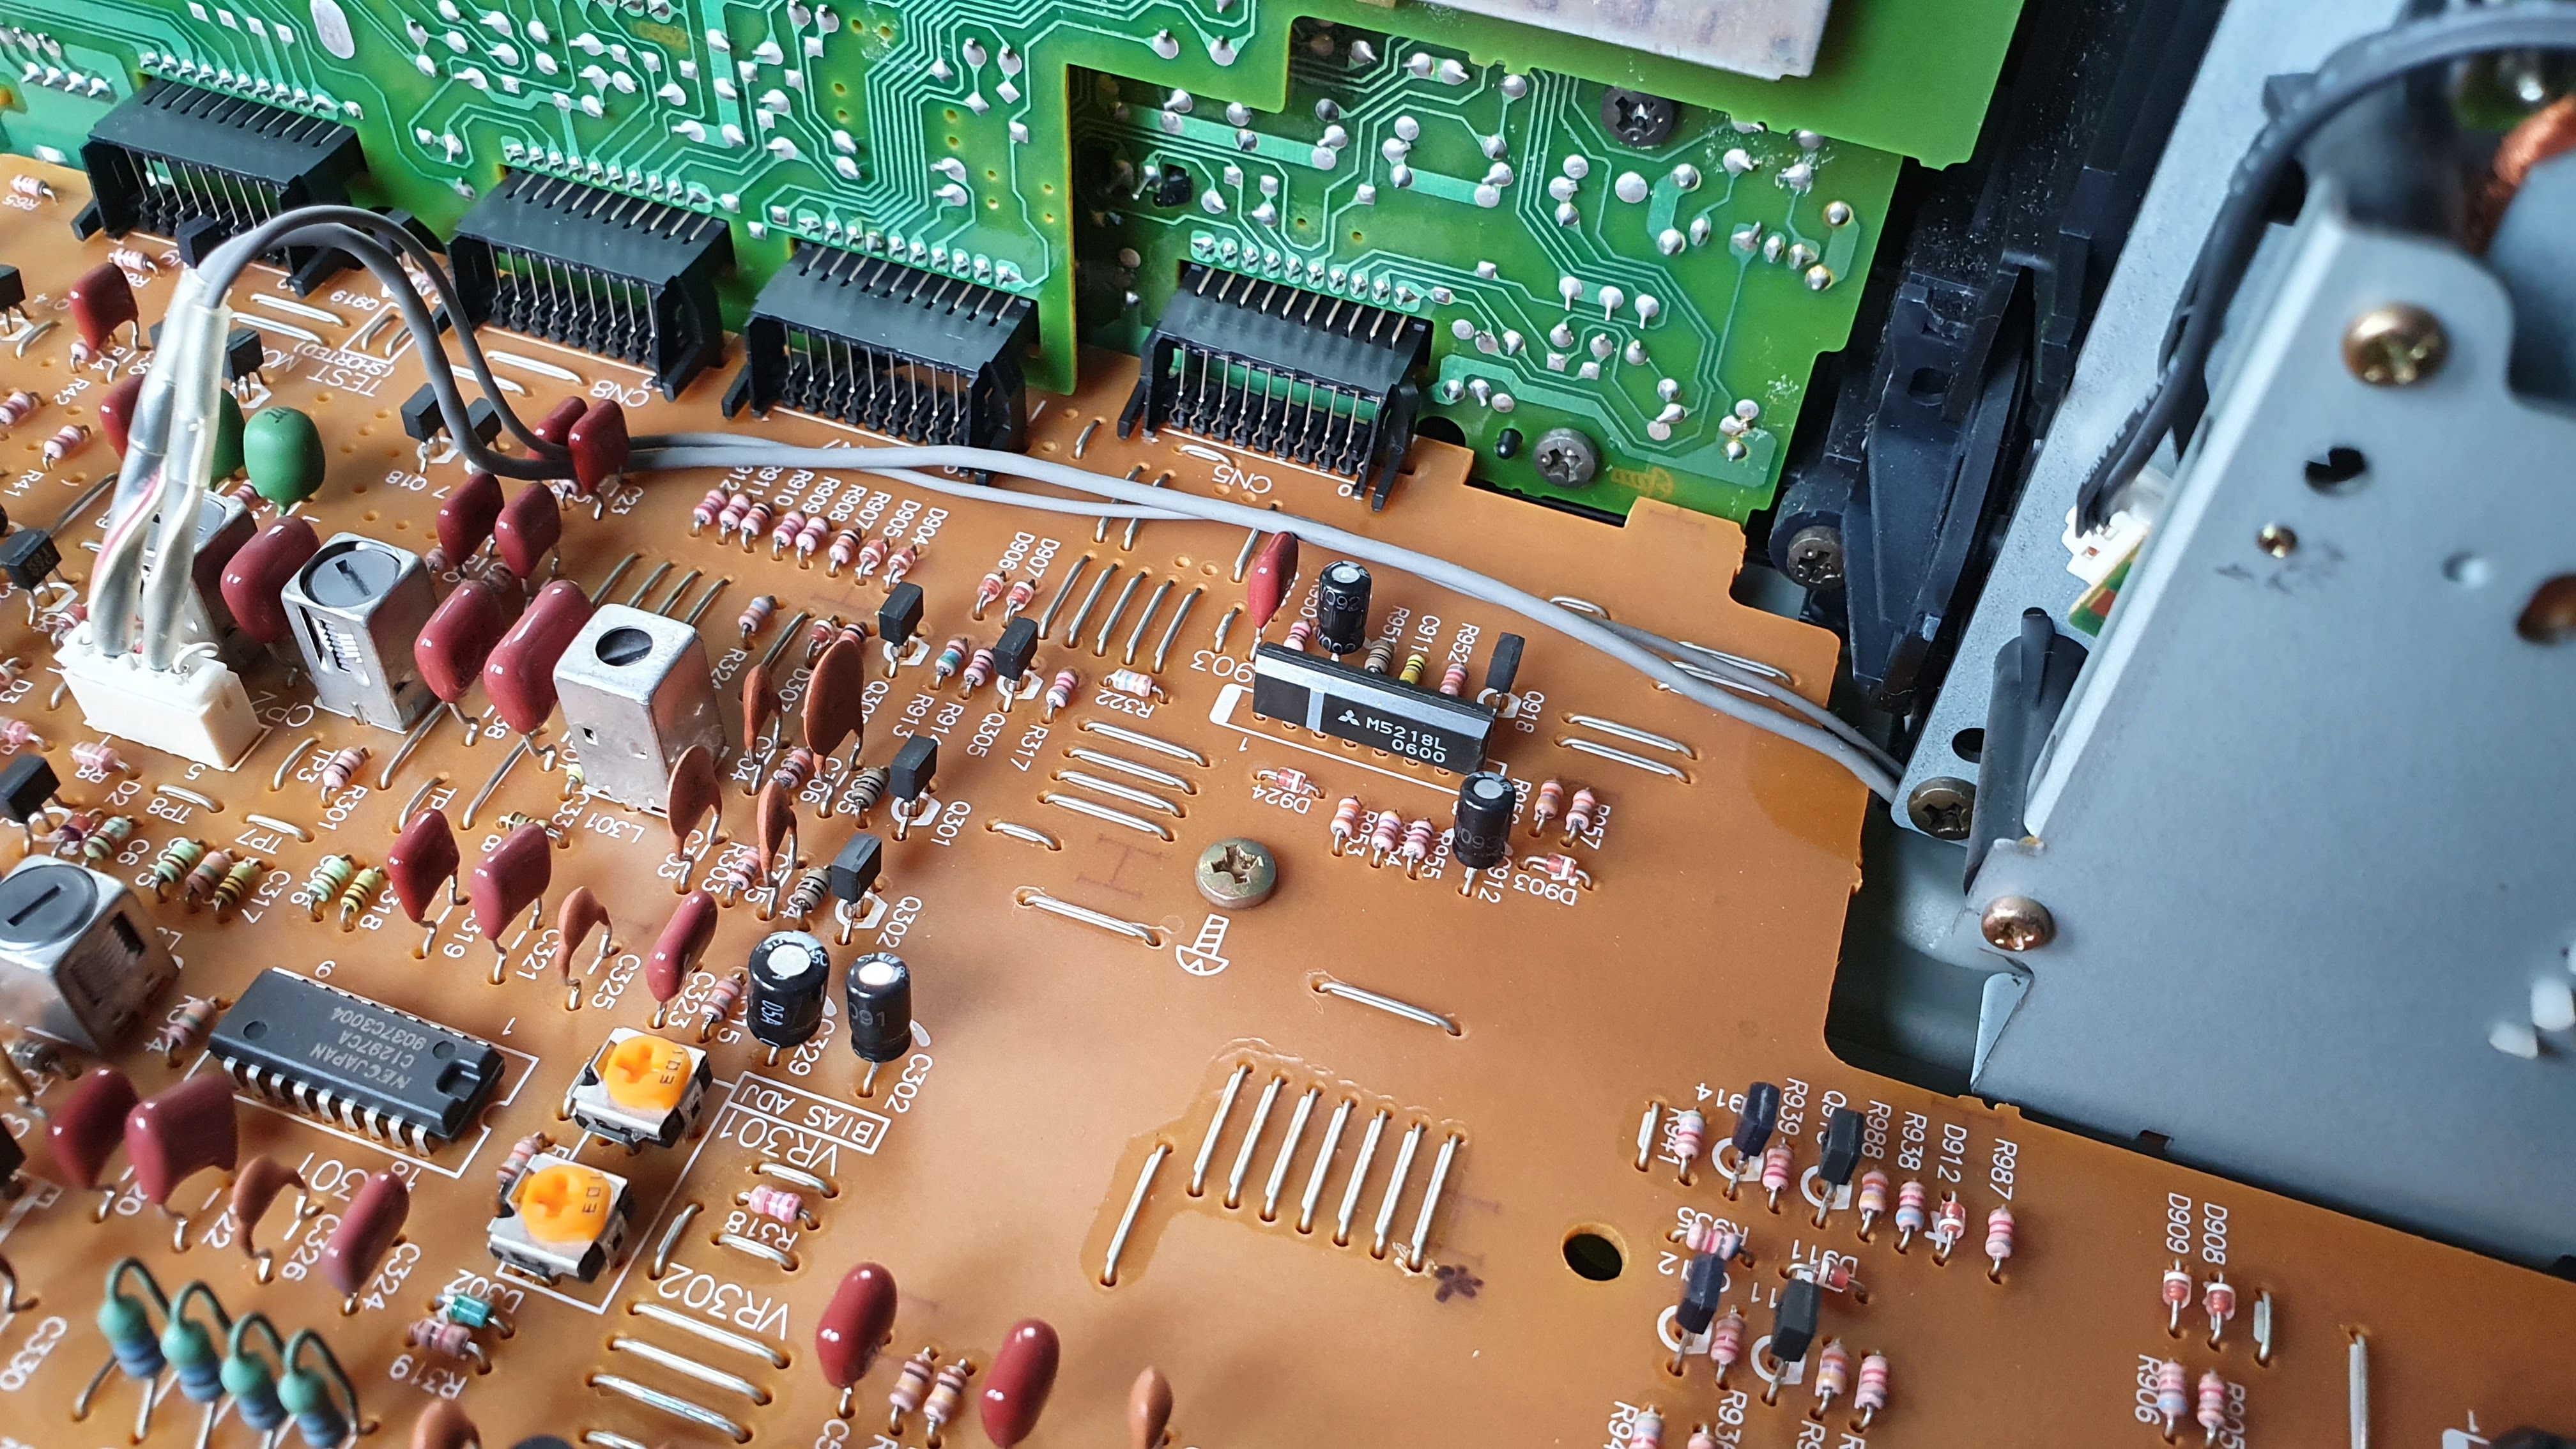
I extended pins 8 & 9 of CP5 to a socket on the back panel with screened cable.
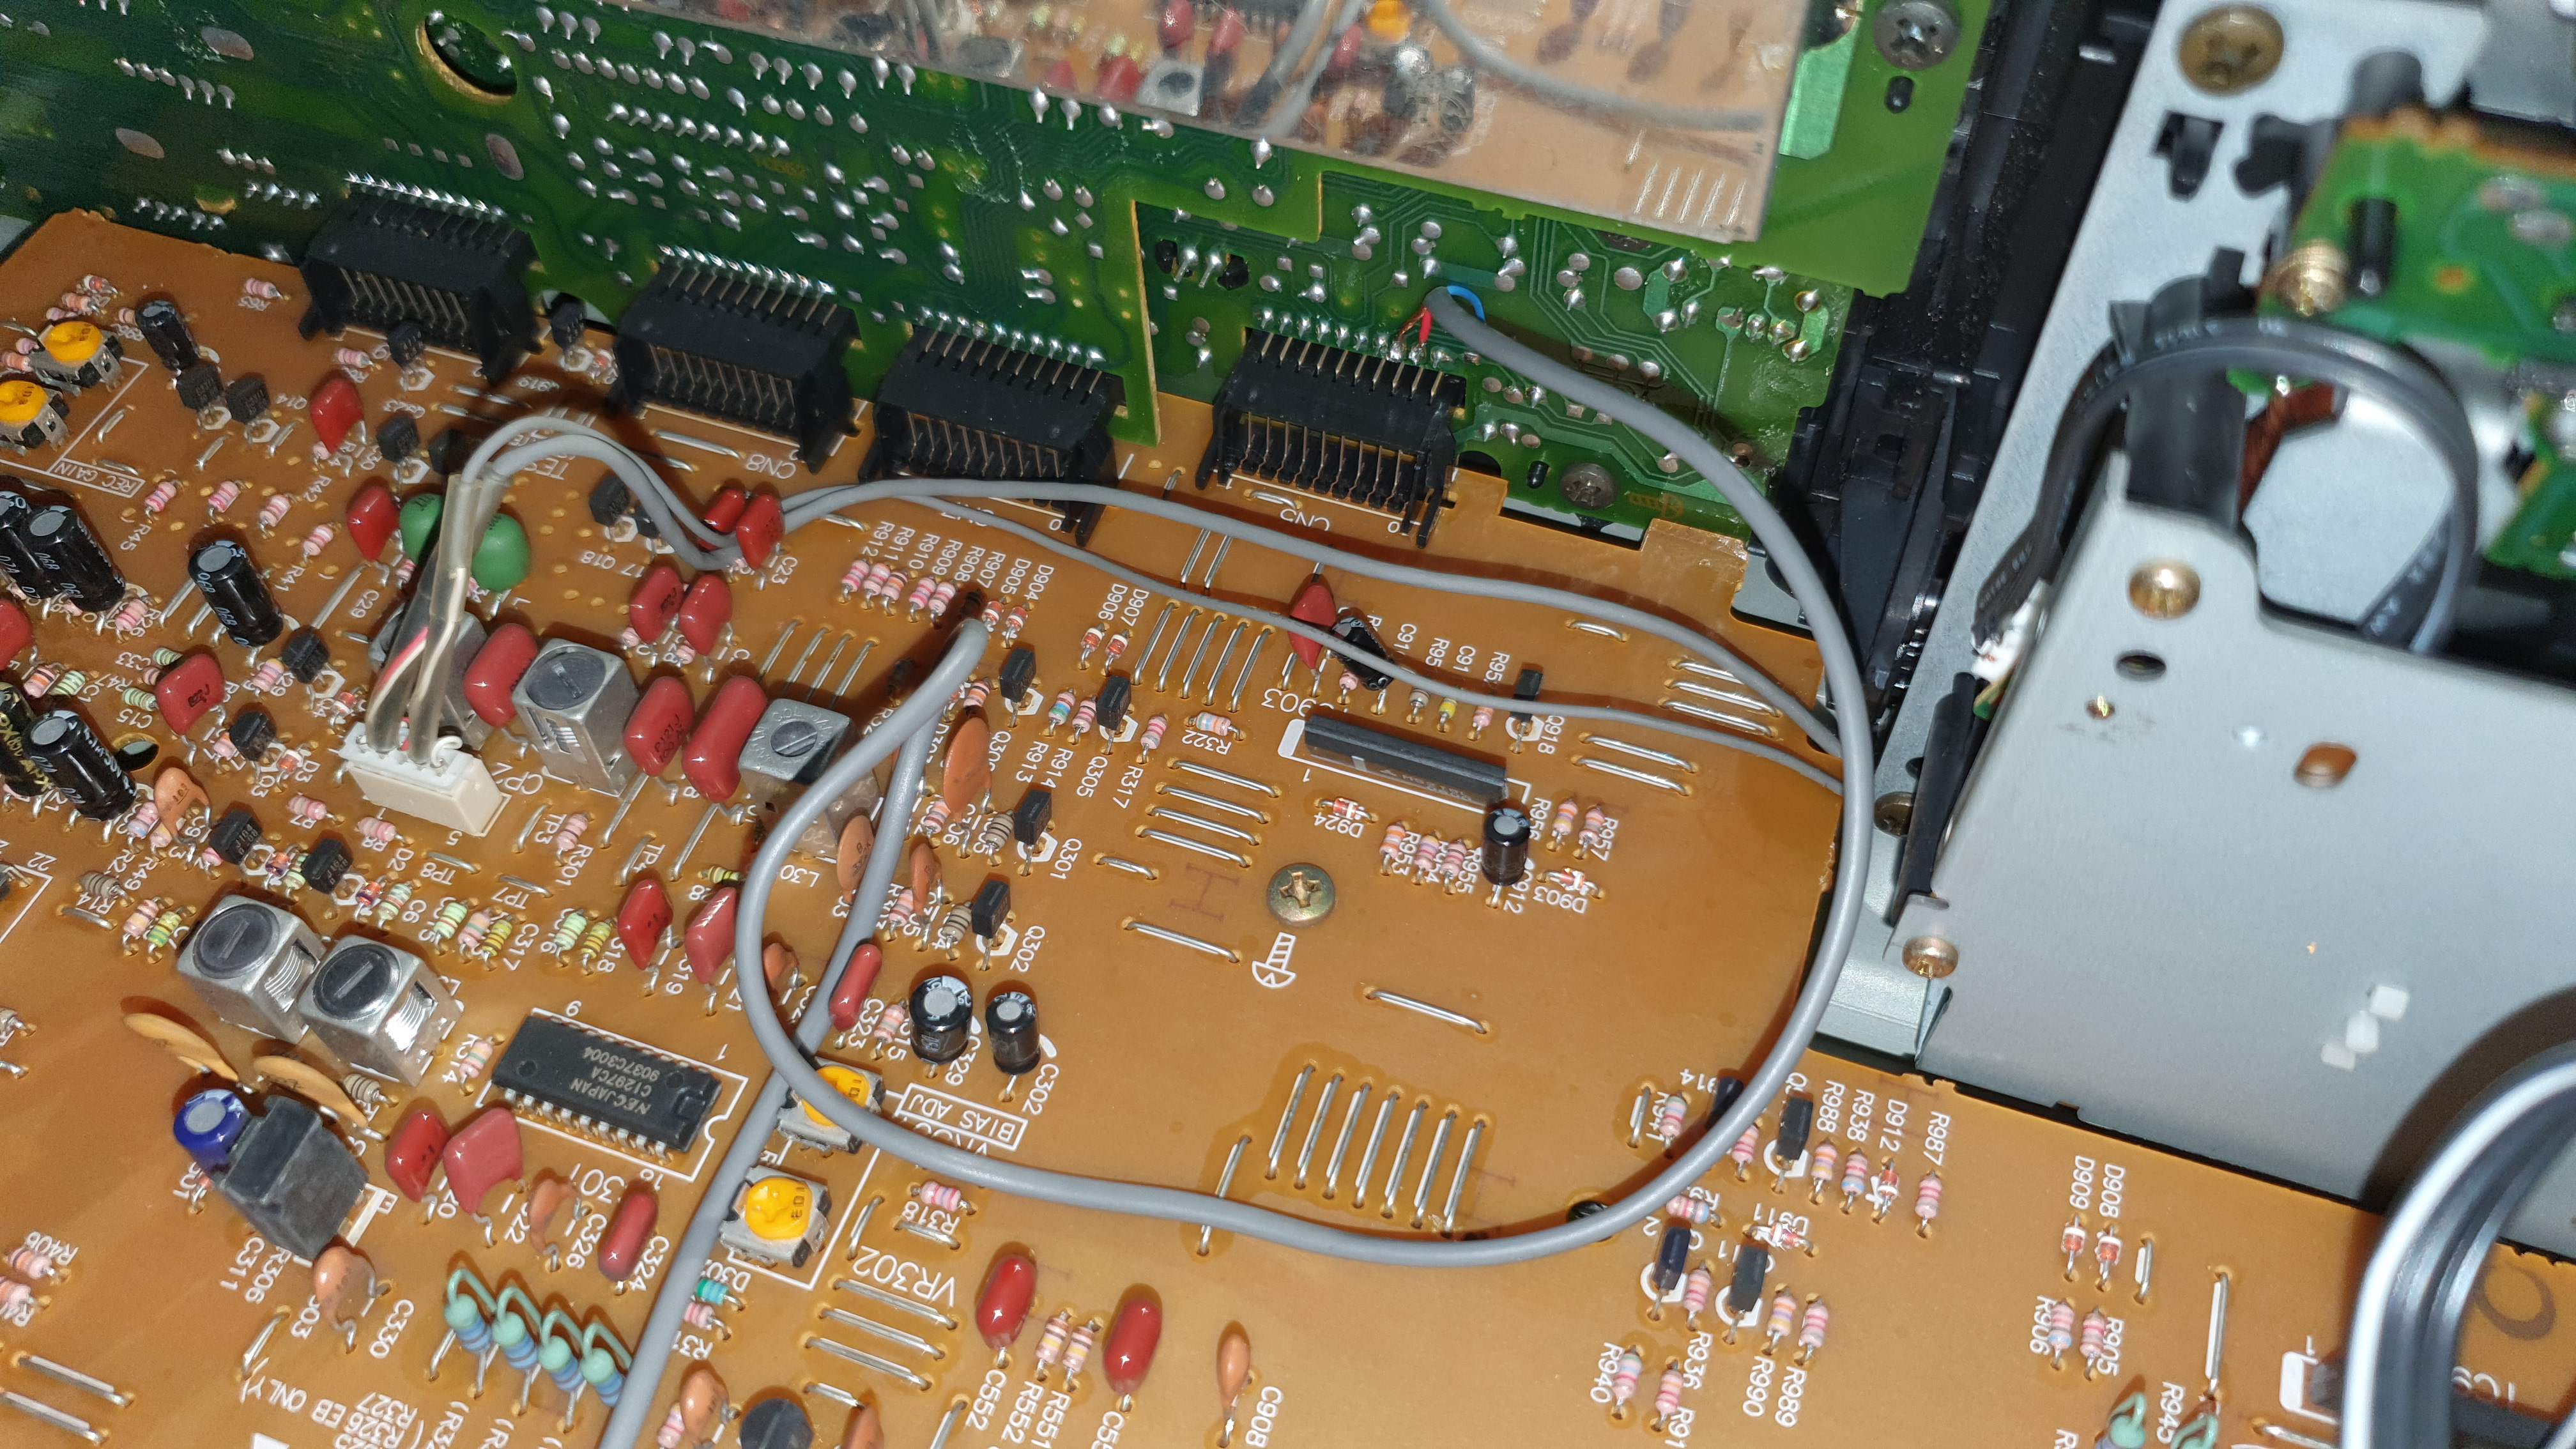
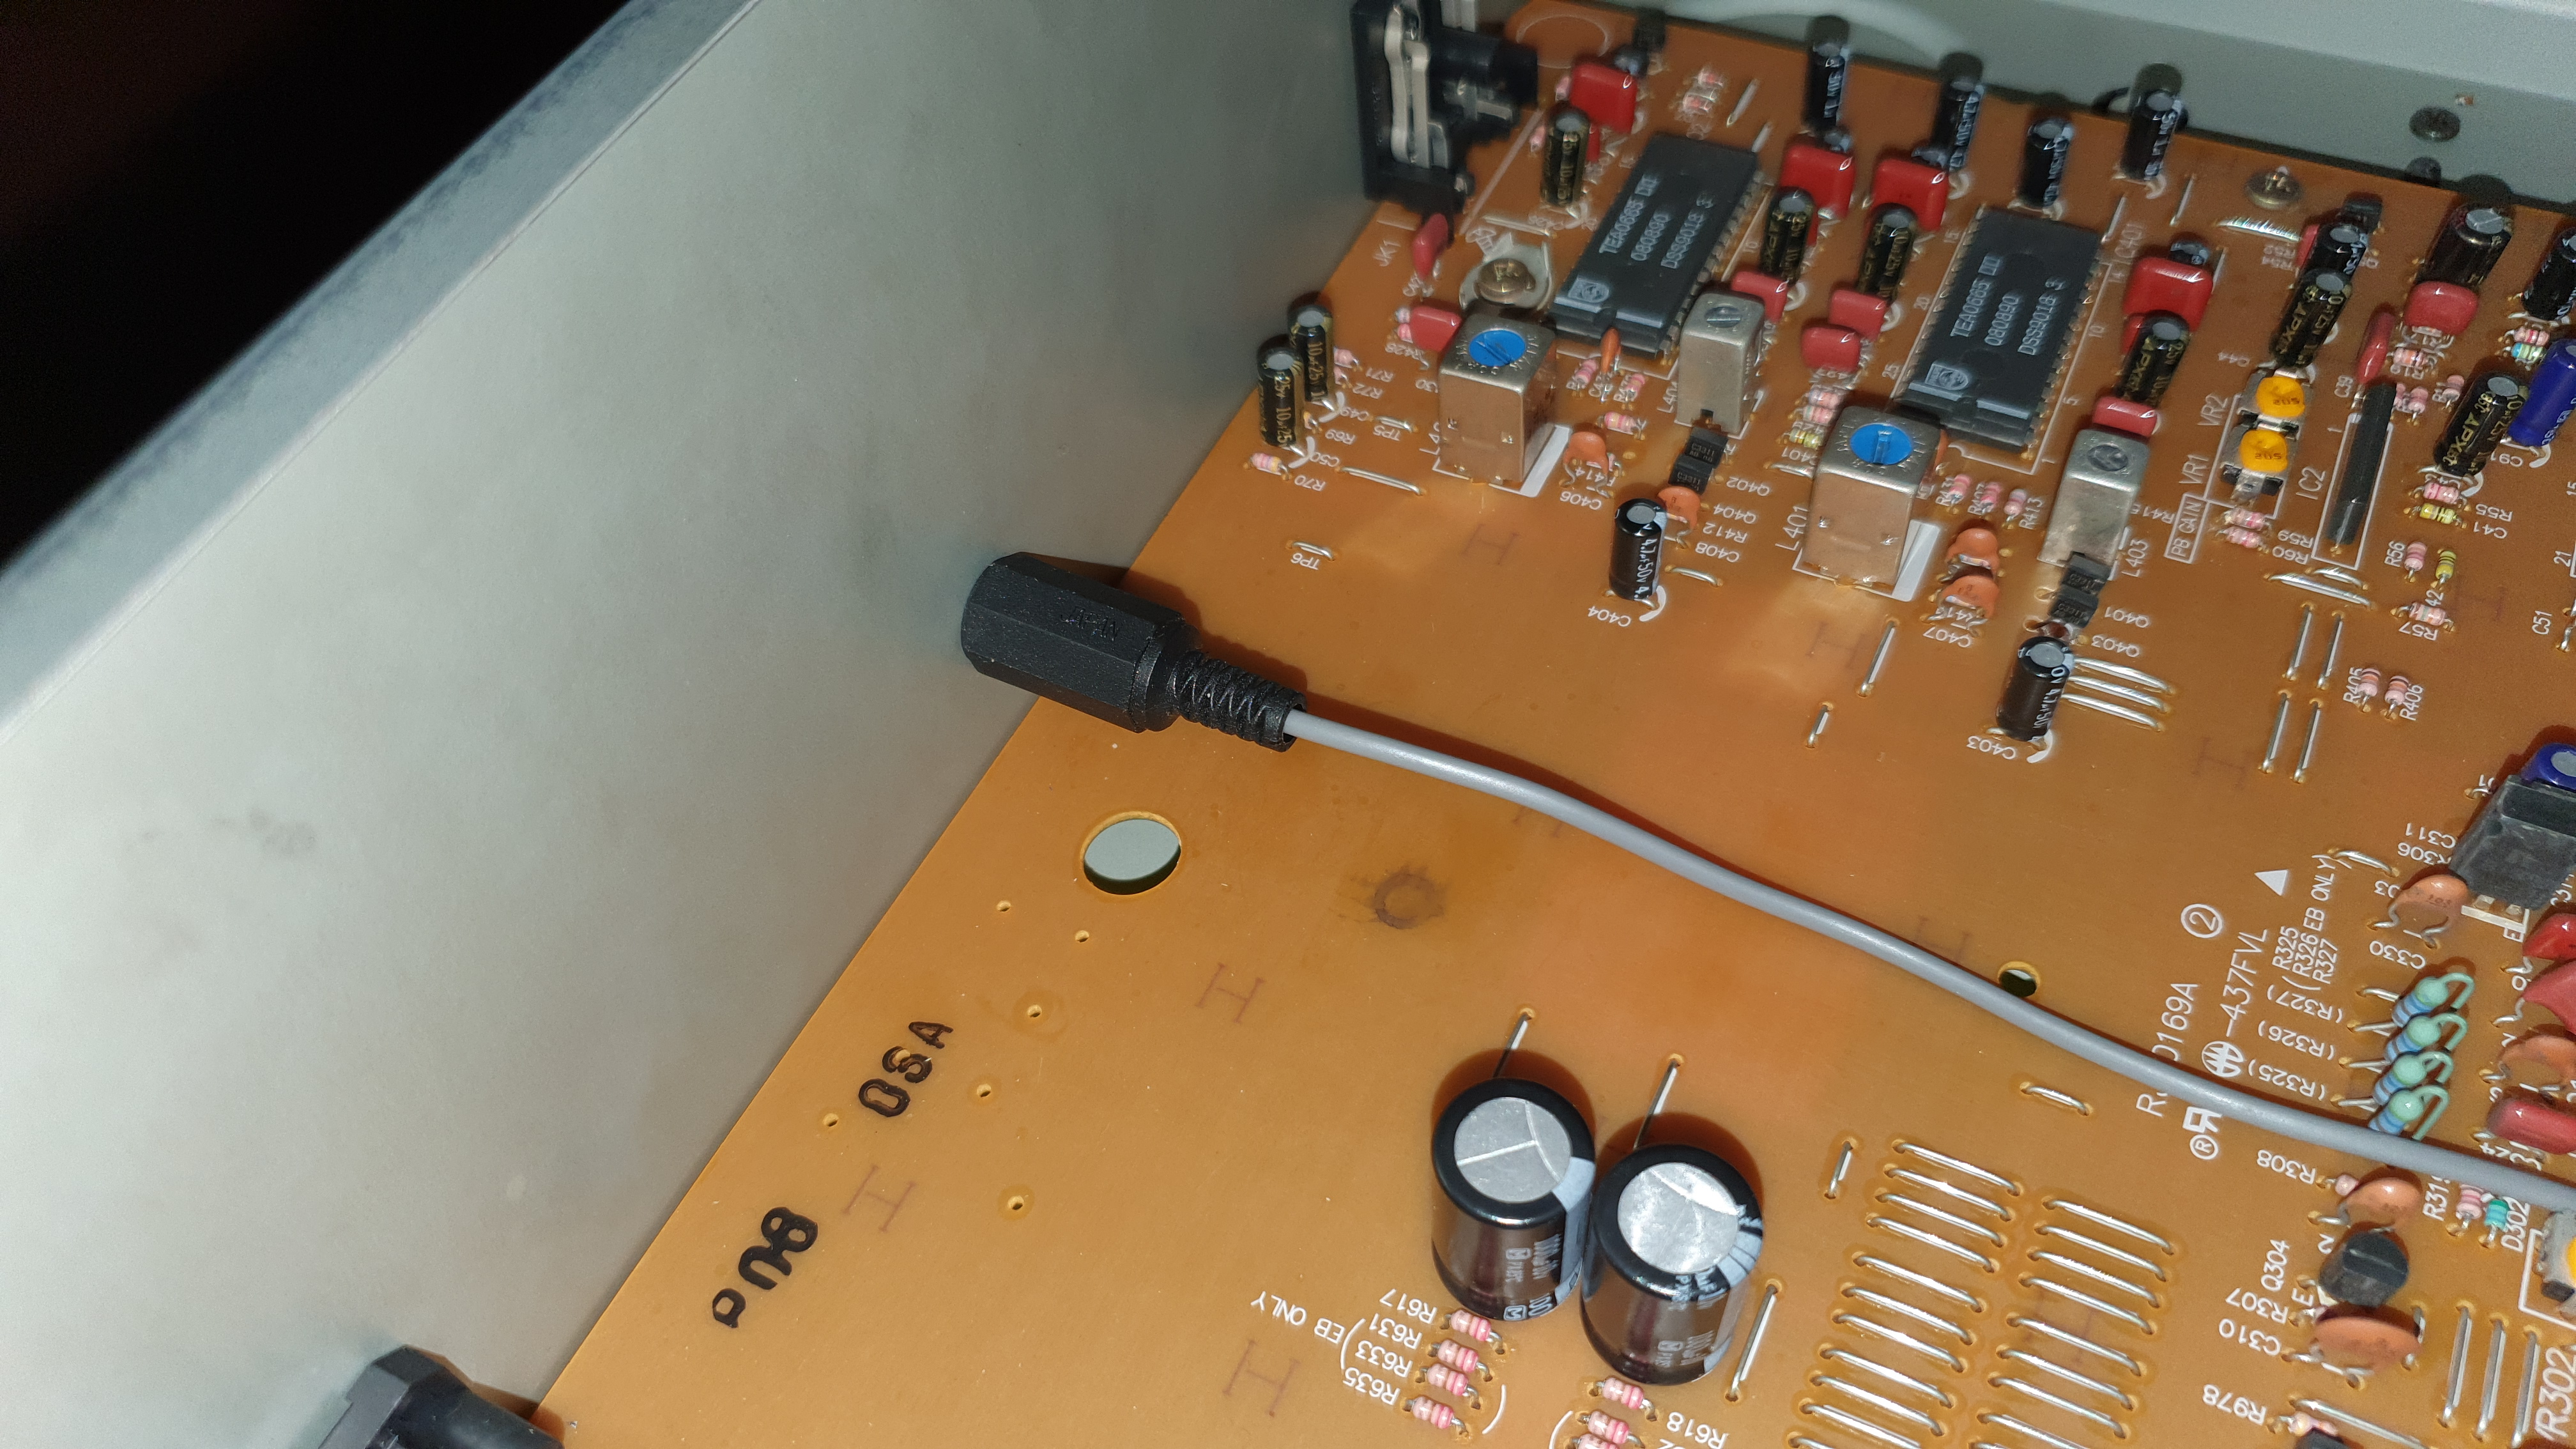

I used a 4-pin connector and 2-core screened cable in case I wanted to expand the functionality & pick up the other input signal at a later date. You could actually pick up the input signal from CN5 pin 9 on the main PCB, as it’s tracked through one of the soldered wire links (marked with a tiny black sharpie * in the photo) close to Q912, and any GND signal would probably suffice.
The Node-Red flows are about as basic as you can get – I created a button on the dashboard/UI that links to an “exec” block that just runs the relevant Python script that toggles the correct GPIO pin on for 0.3s then off again.

Example python code to enter “PLAY” mode – this operates relay #4 for 0.3s via GPIO22 (pin 15 of the Pi 40-way header)
pi@pistreamer:~/RS-B665_control $ cat PLAY.py
 import RPi.GPIO as GPIO
 import os
 import time
 GPIO setup
 GPIO.setmode(GPIO.BCM)
 GPIO.setwarnings(False)
 GPIO.setup(22, GPIO.OUT)
 GPIO.output(22, GPIO.HIGH)
 time.sleep(0.3)
 GPIO.output(22, GPIO.LOW)
The 4-way relay module I had for testing was a really cheap-and-nasty thing – and it was active low triggered which means I had to switch from using NO contacts to NC for testing. (Amazon reviewers claim the relays only last a few hours!) During testing I had some pretty dodgy wiring – I used a croc clip to pick up 5V from the Pi header – but it worked!
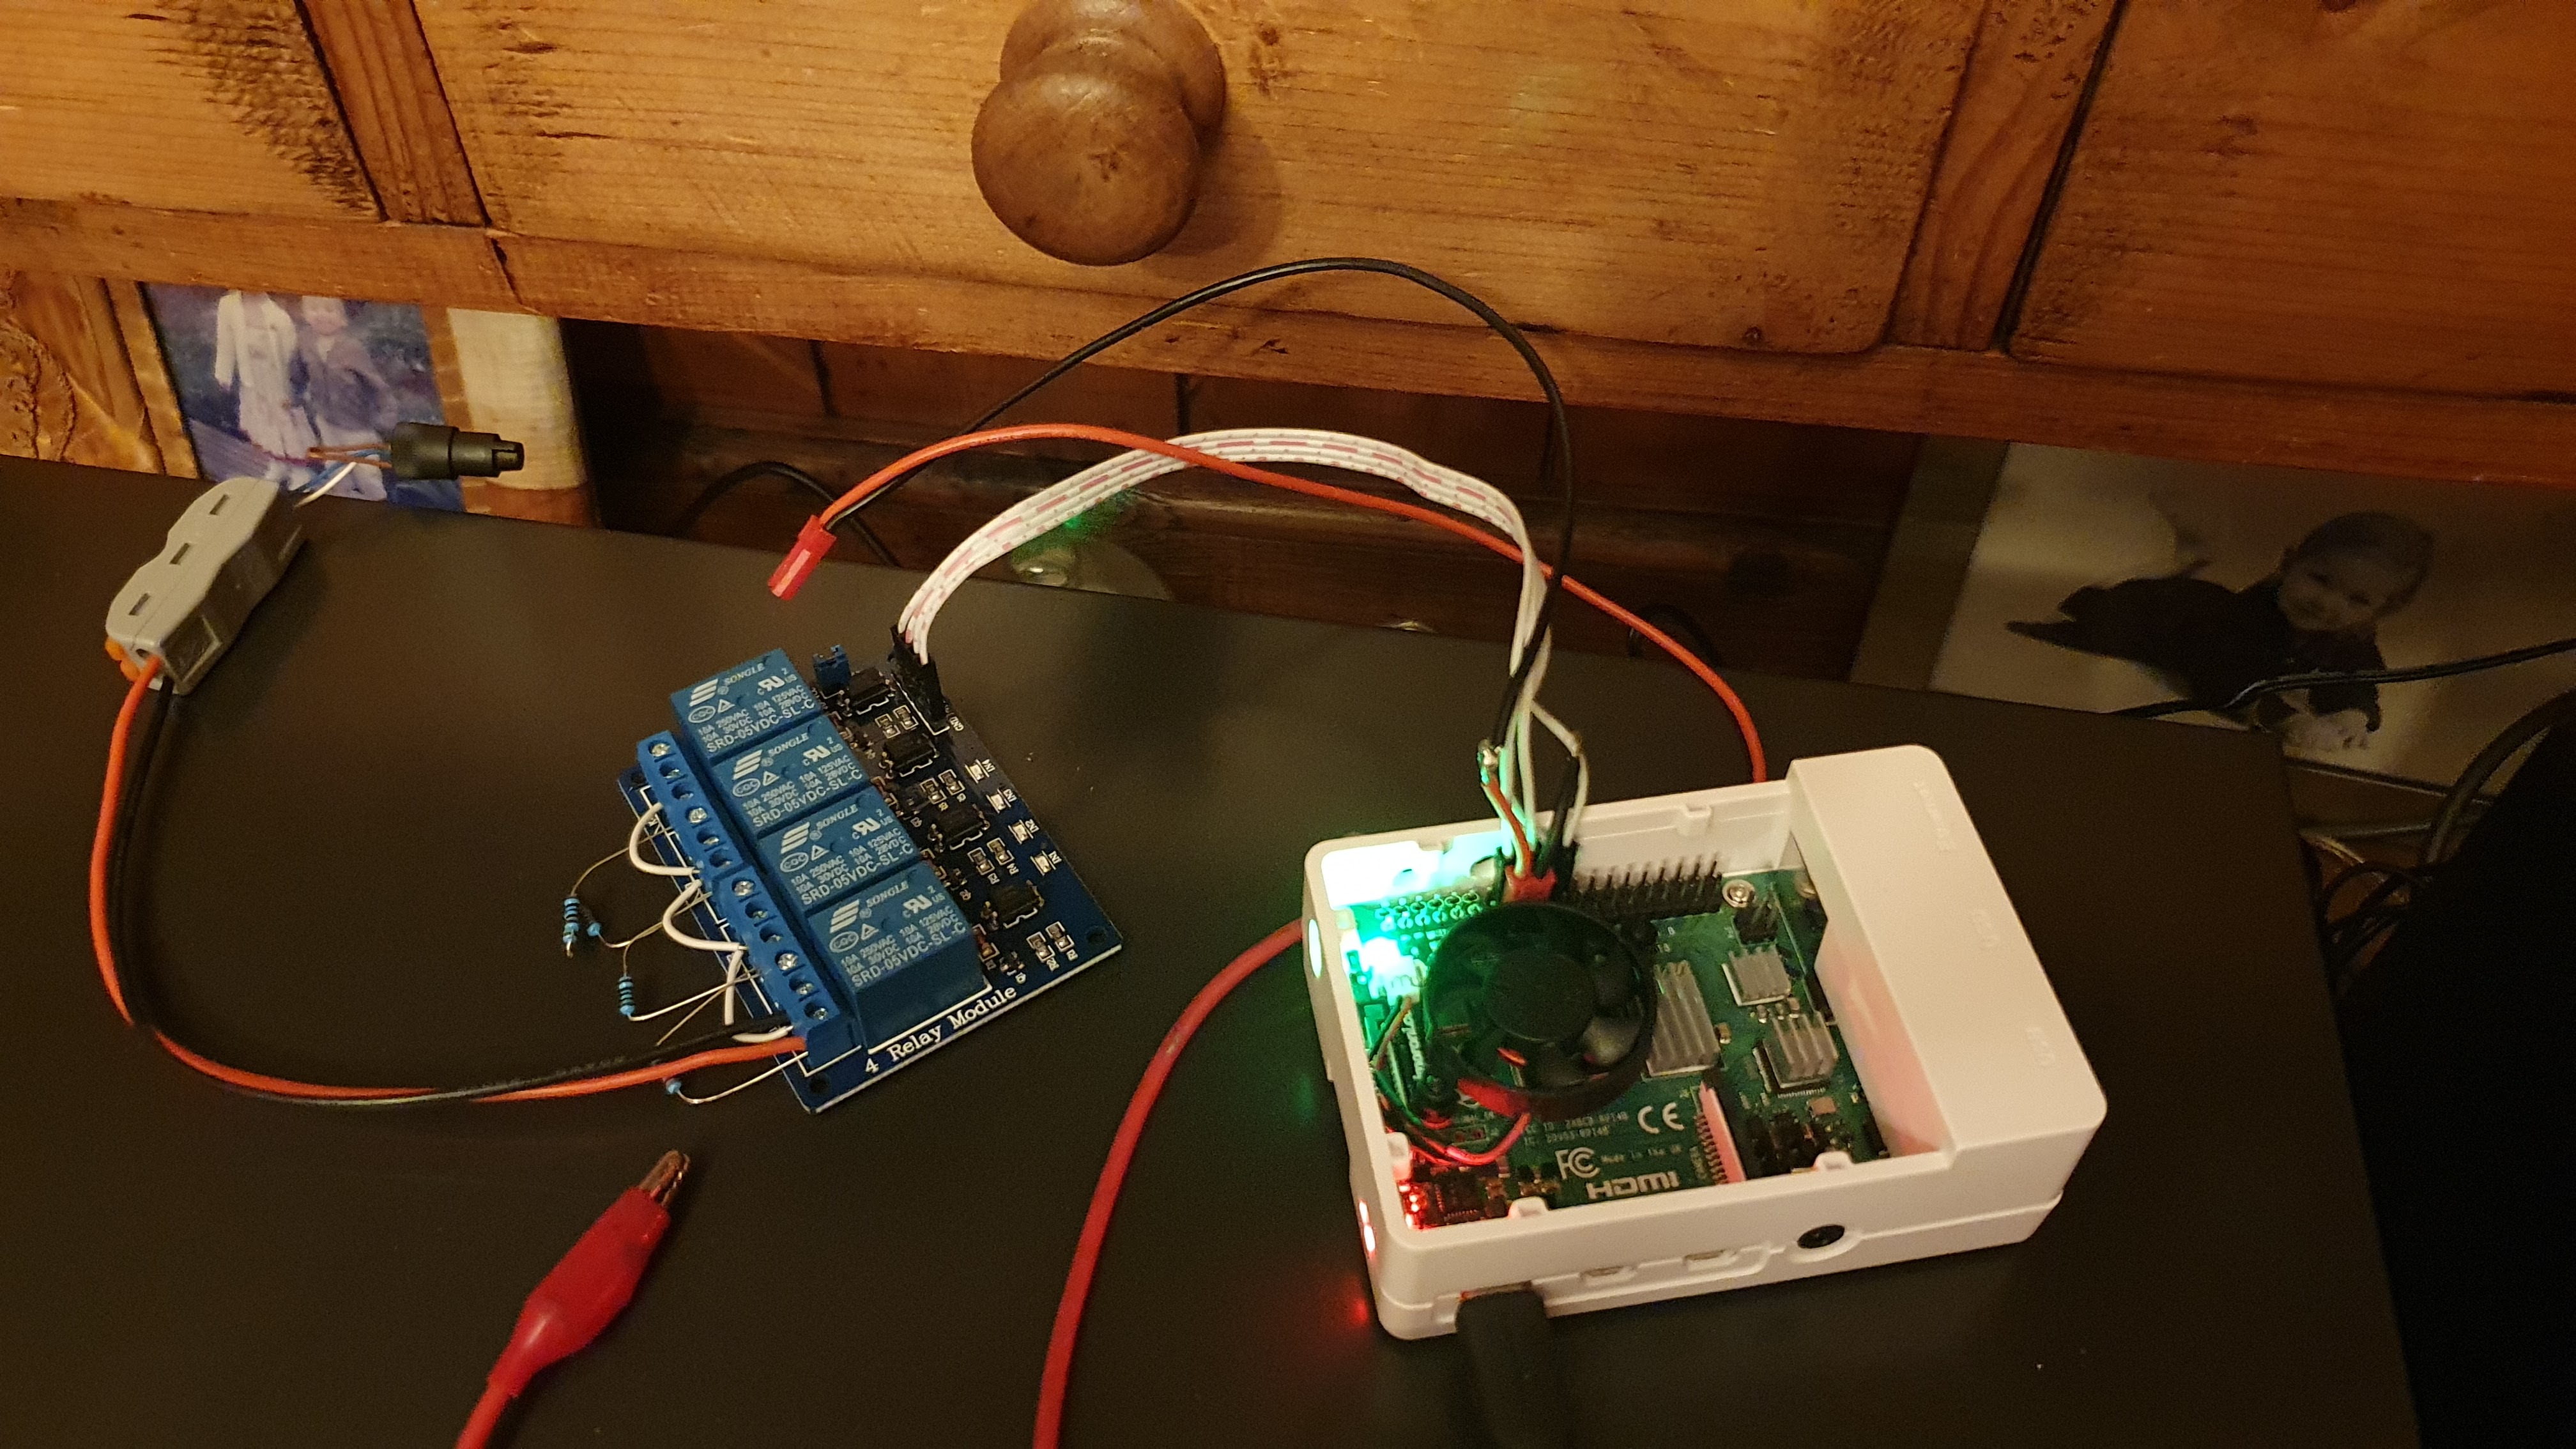
FF - Purple - GPIO24 pin 18
PLAY - Blue - GPIO22 pin 15
REW - Grey - GPIO 25 pin 22
STOP - White - GPIO23 pin 16


                            J8
                           .___.
                  +3V3---1-|O O|--2--+5V
          (SDA)  GPIO2---3-|O O|--4--+5V
         (SCL1)  GPIO3---5-|O O|--6--_
    (GPIO_GLCK)  GPIO4---7-|O O|--8-----GPIO14 (TXD0)
                      _--9-|O.O|-10-----GPIO15 (RXD0)
    (GPIO_GEN0) GPIO17--11-|O O|-12-----GPIO18 (GPIO_GEN1)
    (GPIO_GEN2) GPIO27--13-|O O|-14--_
    (GPIO_GEN3) GPIO22--15-|x x|-16-----GPIO23 (GPIO_GEN4)
                  +3V3--17-|O O|-18-----GPIO24 (GPIO_GEN5)
     (SPI_MOSI) GPIO10--19-|O.x|-20--_
     (SPI_MISO) GPIO9 --21-|O x|-22-----GPIO25 (GPIO_GEN6)
     (SPI_SCLK) GPIO11--23-|O O|-24-----GPIO8  (SPI_C0_N)
                      _-25-|O O|-26-----GPIO7  (SPI_C1_N)
       (EEPROM) ID_SD---27-|O O|-28-----ID_SC Reserved for ID EEPROM
                GPIO5---29-|O.O|-30--_
                GPIO6---31-|O O|-32-----GPIO12
                GPIO13--33-|O O|-34--_
                GPIO19--35-|O O|-36-----GPIO16
                GPIO26--37-|O O|-38-----GPIO20
                      _-39-|O O|-40-----GPIO21
                           '---'
                       40W 0.1" PIN HDR
This approach should work with all Technics decks that use the same mechanism – I’m guessing RS-B555, RS-B655, RS-B765 at least, maybe more. If they share the identical “SECTION K OPERATION SWITCH CIRCUIT” as part of their schematic then you’re good to go 🙂
Now the basic functionality is there I’m thinking of adding a bit more intelligence, maybe sensing if the deck is powered on, what mode it’s in: getting some info from the deck back into the Pi…

Some really cool cassette tape hacking right here. If you’ve found any of this useful I’m always ready for a latte 😉 @zedstarr


10 thoughts on “Technics RS-B665 Cassette Deck Remote Control”